My 3D printed keyboard!
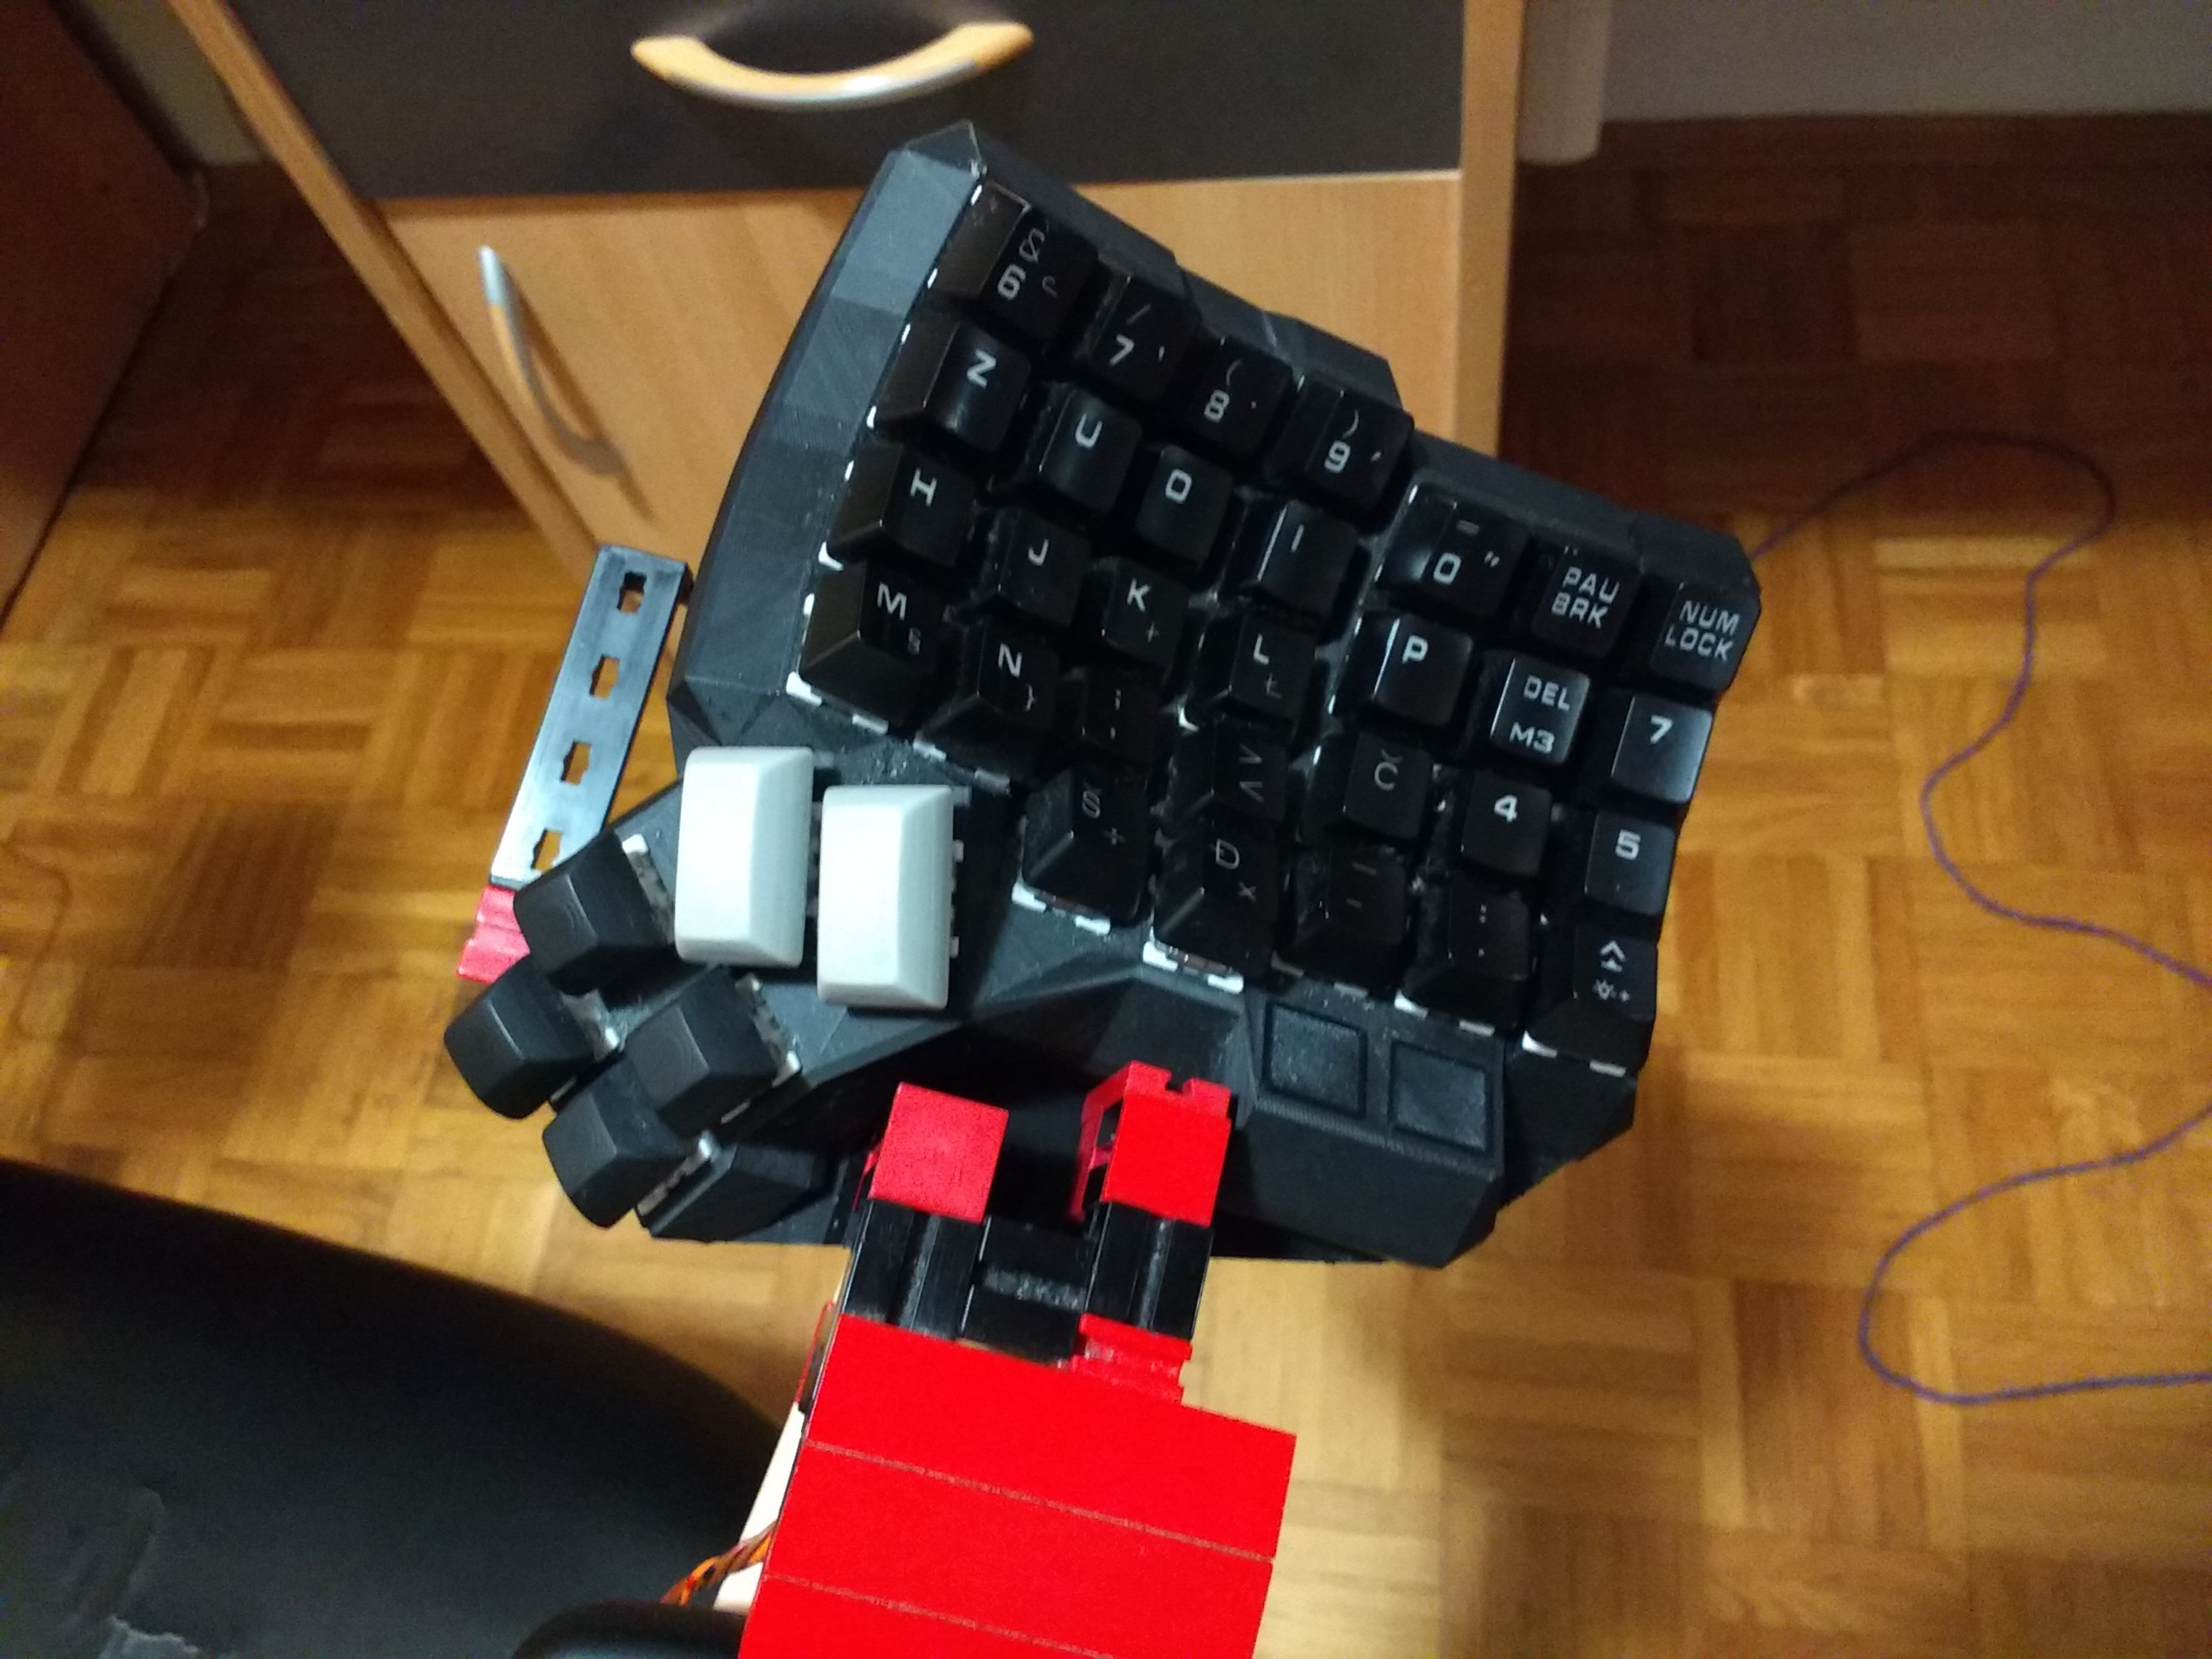
This new keyboard is even weirder than the last! It is based on this, but a little bit modified and upgraded! Just like my previous keyboard, it's be in 2 pieces and tilted. But the big difference is, the left and the right piece don't act as independent keyboards; they are connected and act as one! This makes it more reliable!
I used keycaps from a fake mechanical keyboard which is not being used any more! It is a rubber dome keyboard but with Cherry-compatible stems, it's kinda weird actually! I also printed some custom keycaps for the thumb cluster!
I originally wanted to make it a white frame with grey keycaps, but now when I've added Fischertechnik and black keycaps, white looks ugly! So I decided to reprint it in black!

How much it cost:
- 19€ for 68 Outemu blue mechanical switches
- 7€ for Arduino Teensy 2.0
- 1€ for MCP23017 Serial Interface Module
- 1€ for 100 diodes (1N4148)
- Fischertechnik blocks probably worth around 10€. They are reusable though!
- Keycaps came from a 25€ keyboard
- 6€ for 3D printing filament
- 0.5€ for the TRRS connectors
- 0.1€ for the USB connector
- I already had wires and no idea what they're worth
- Months of work
UPDATE May 22, 2020:
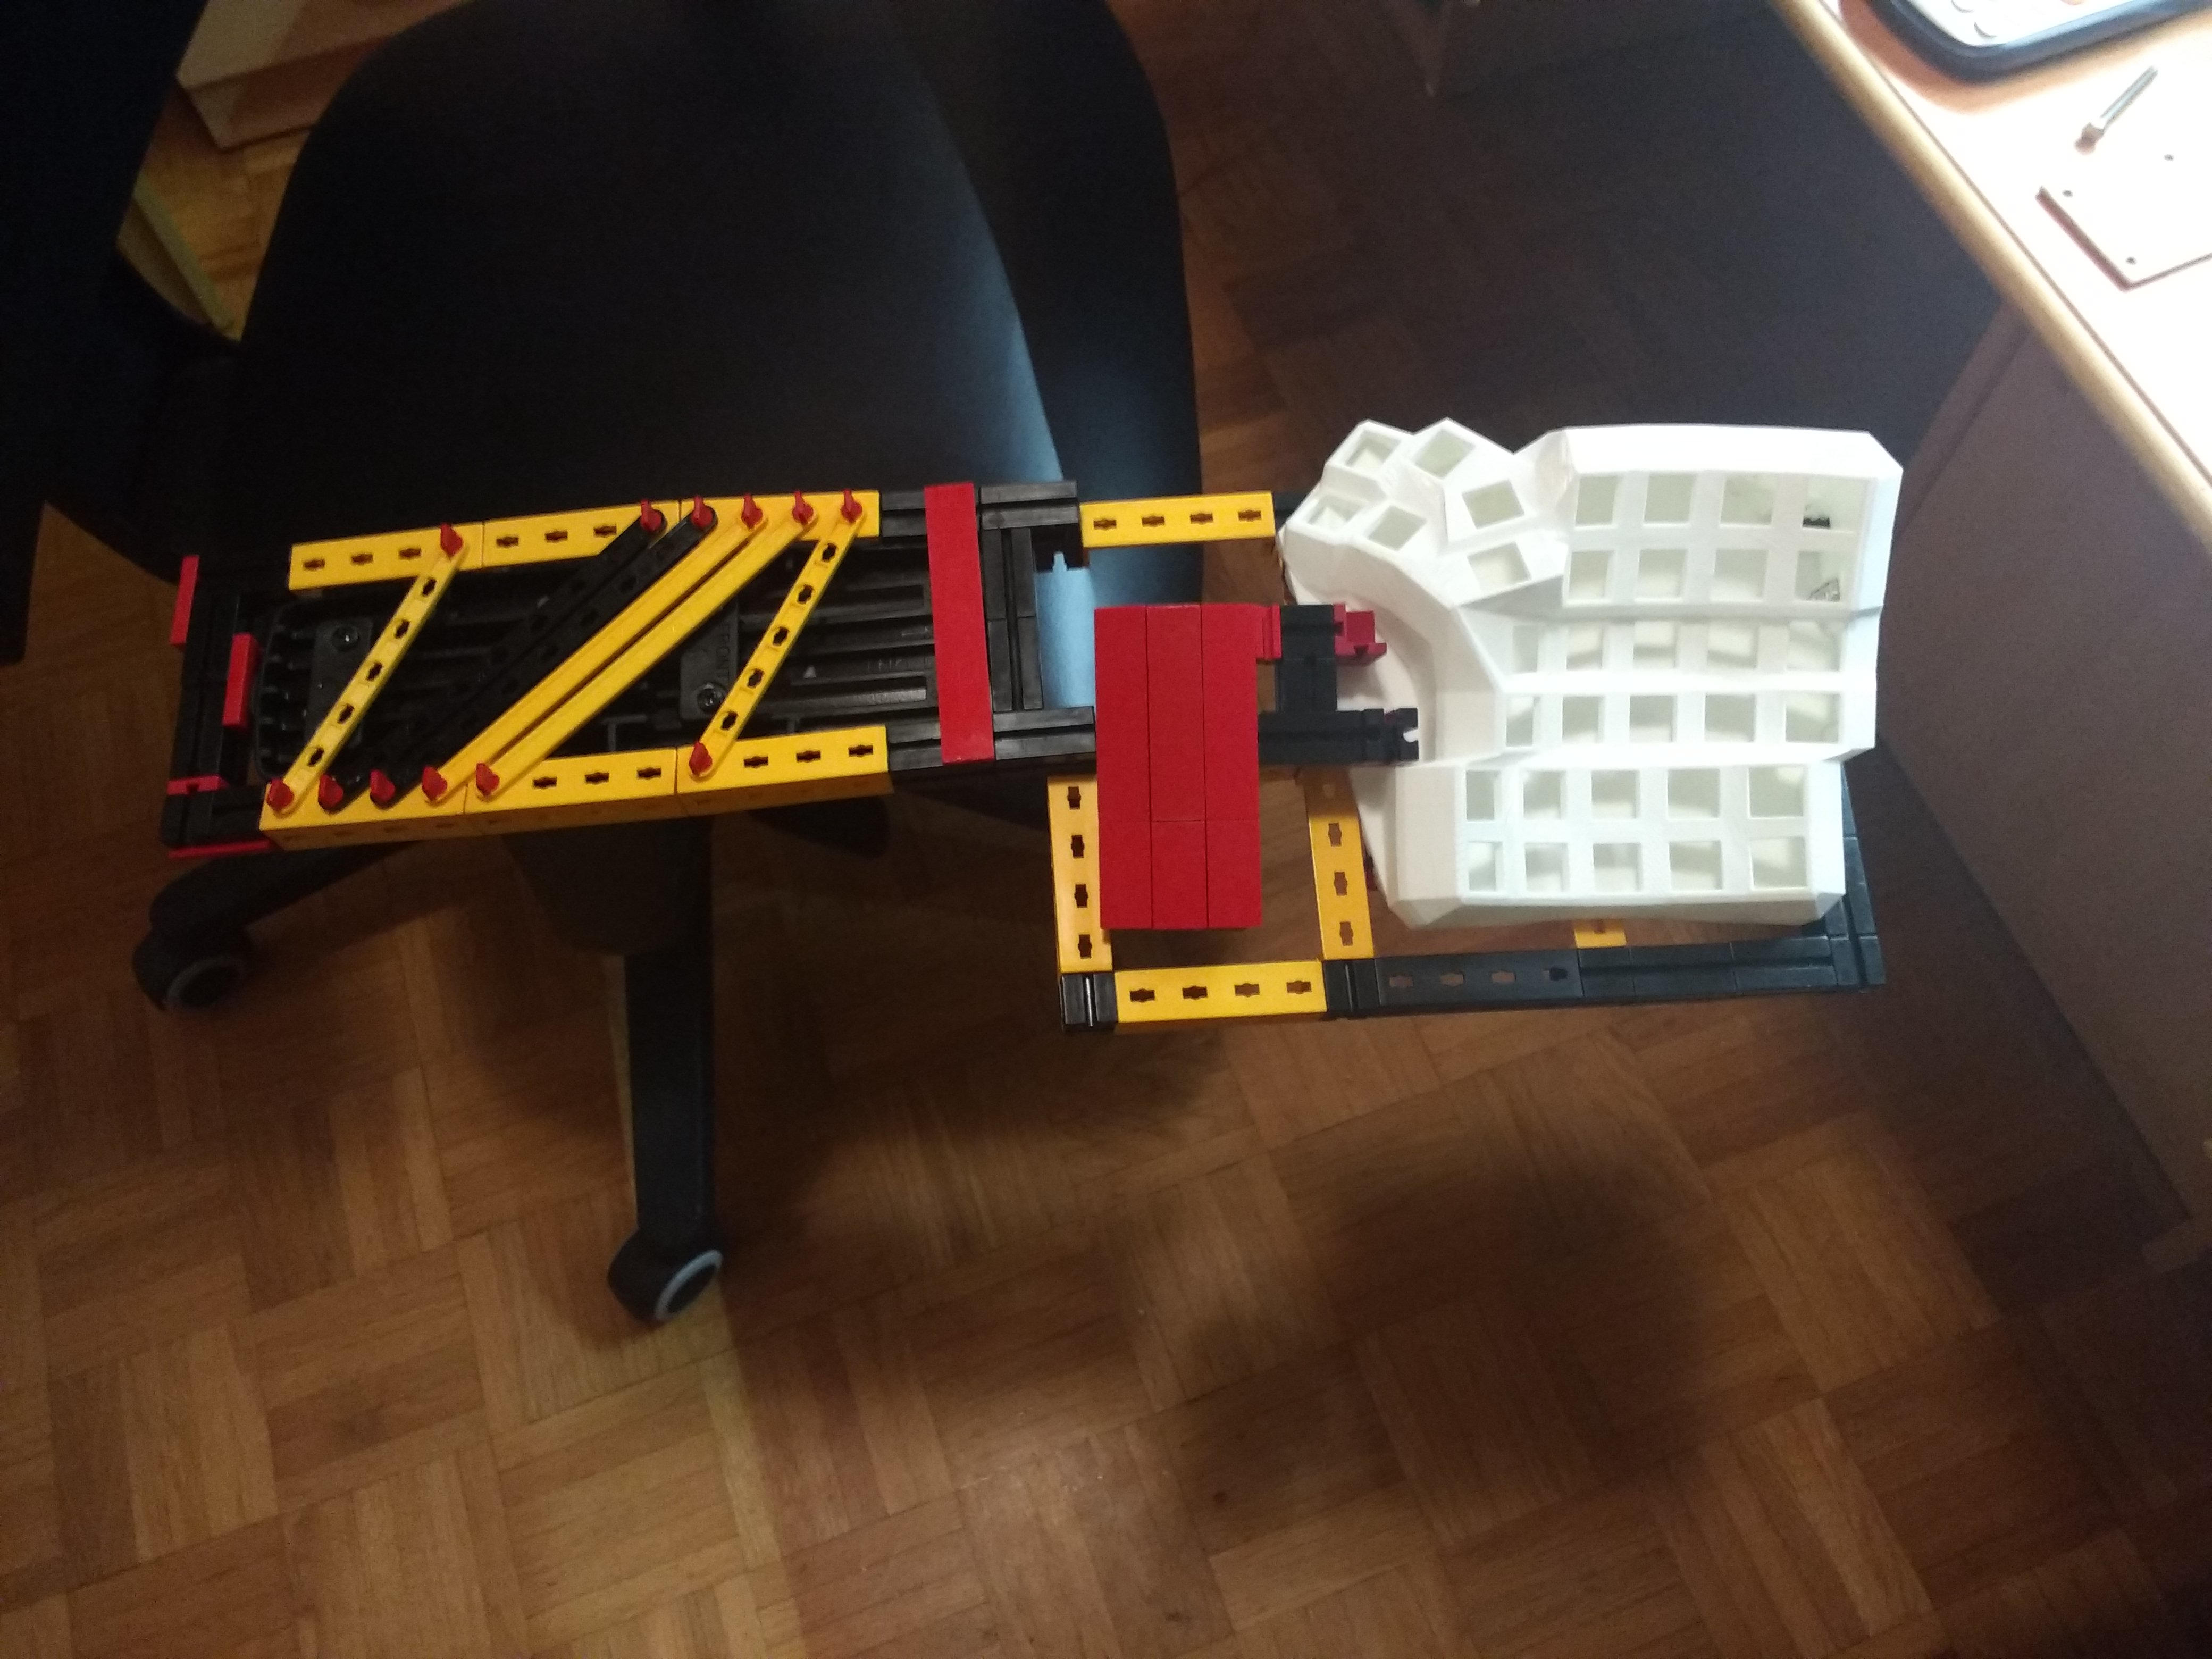
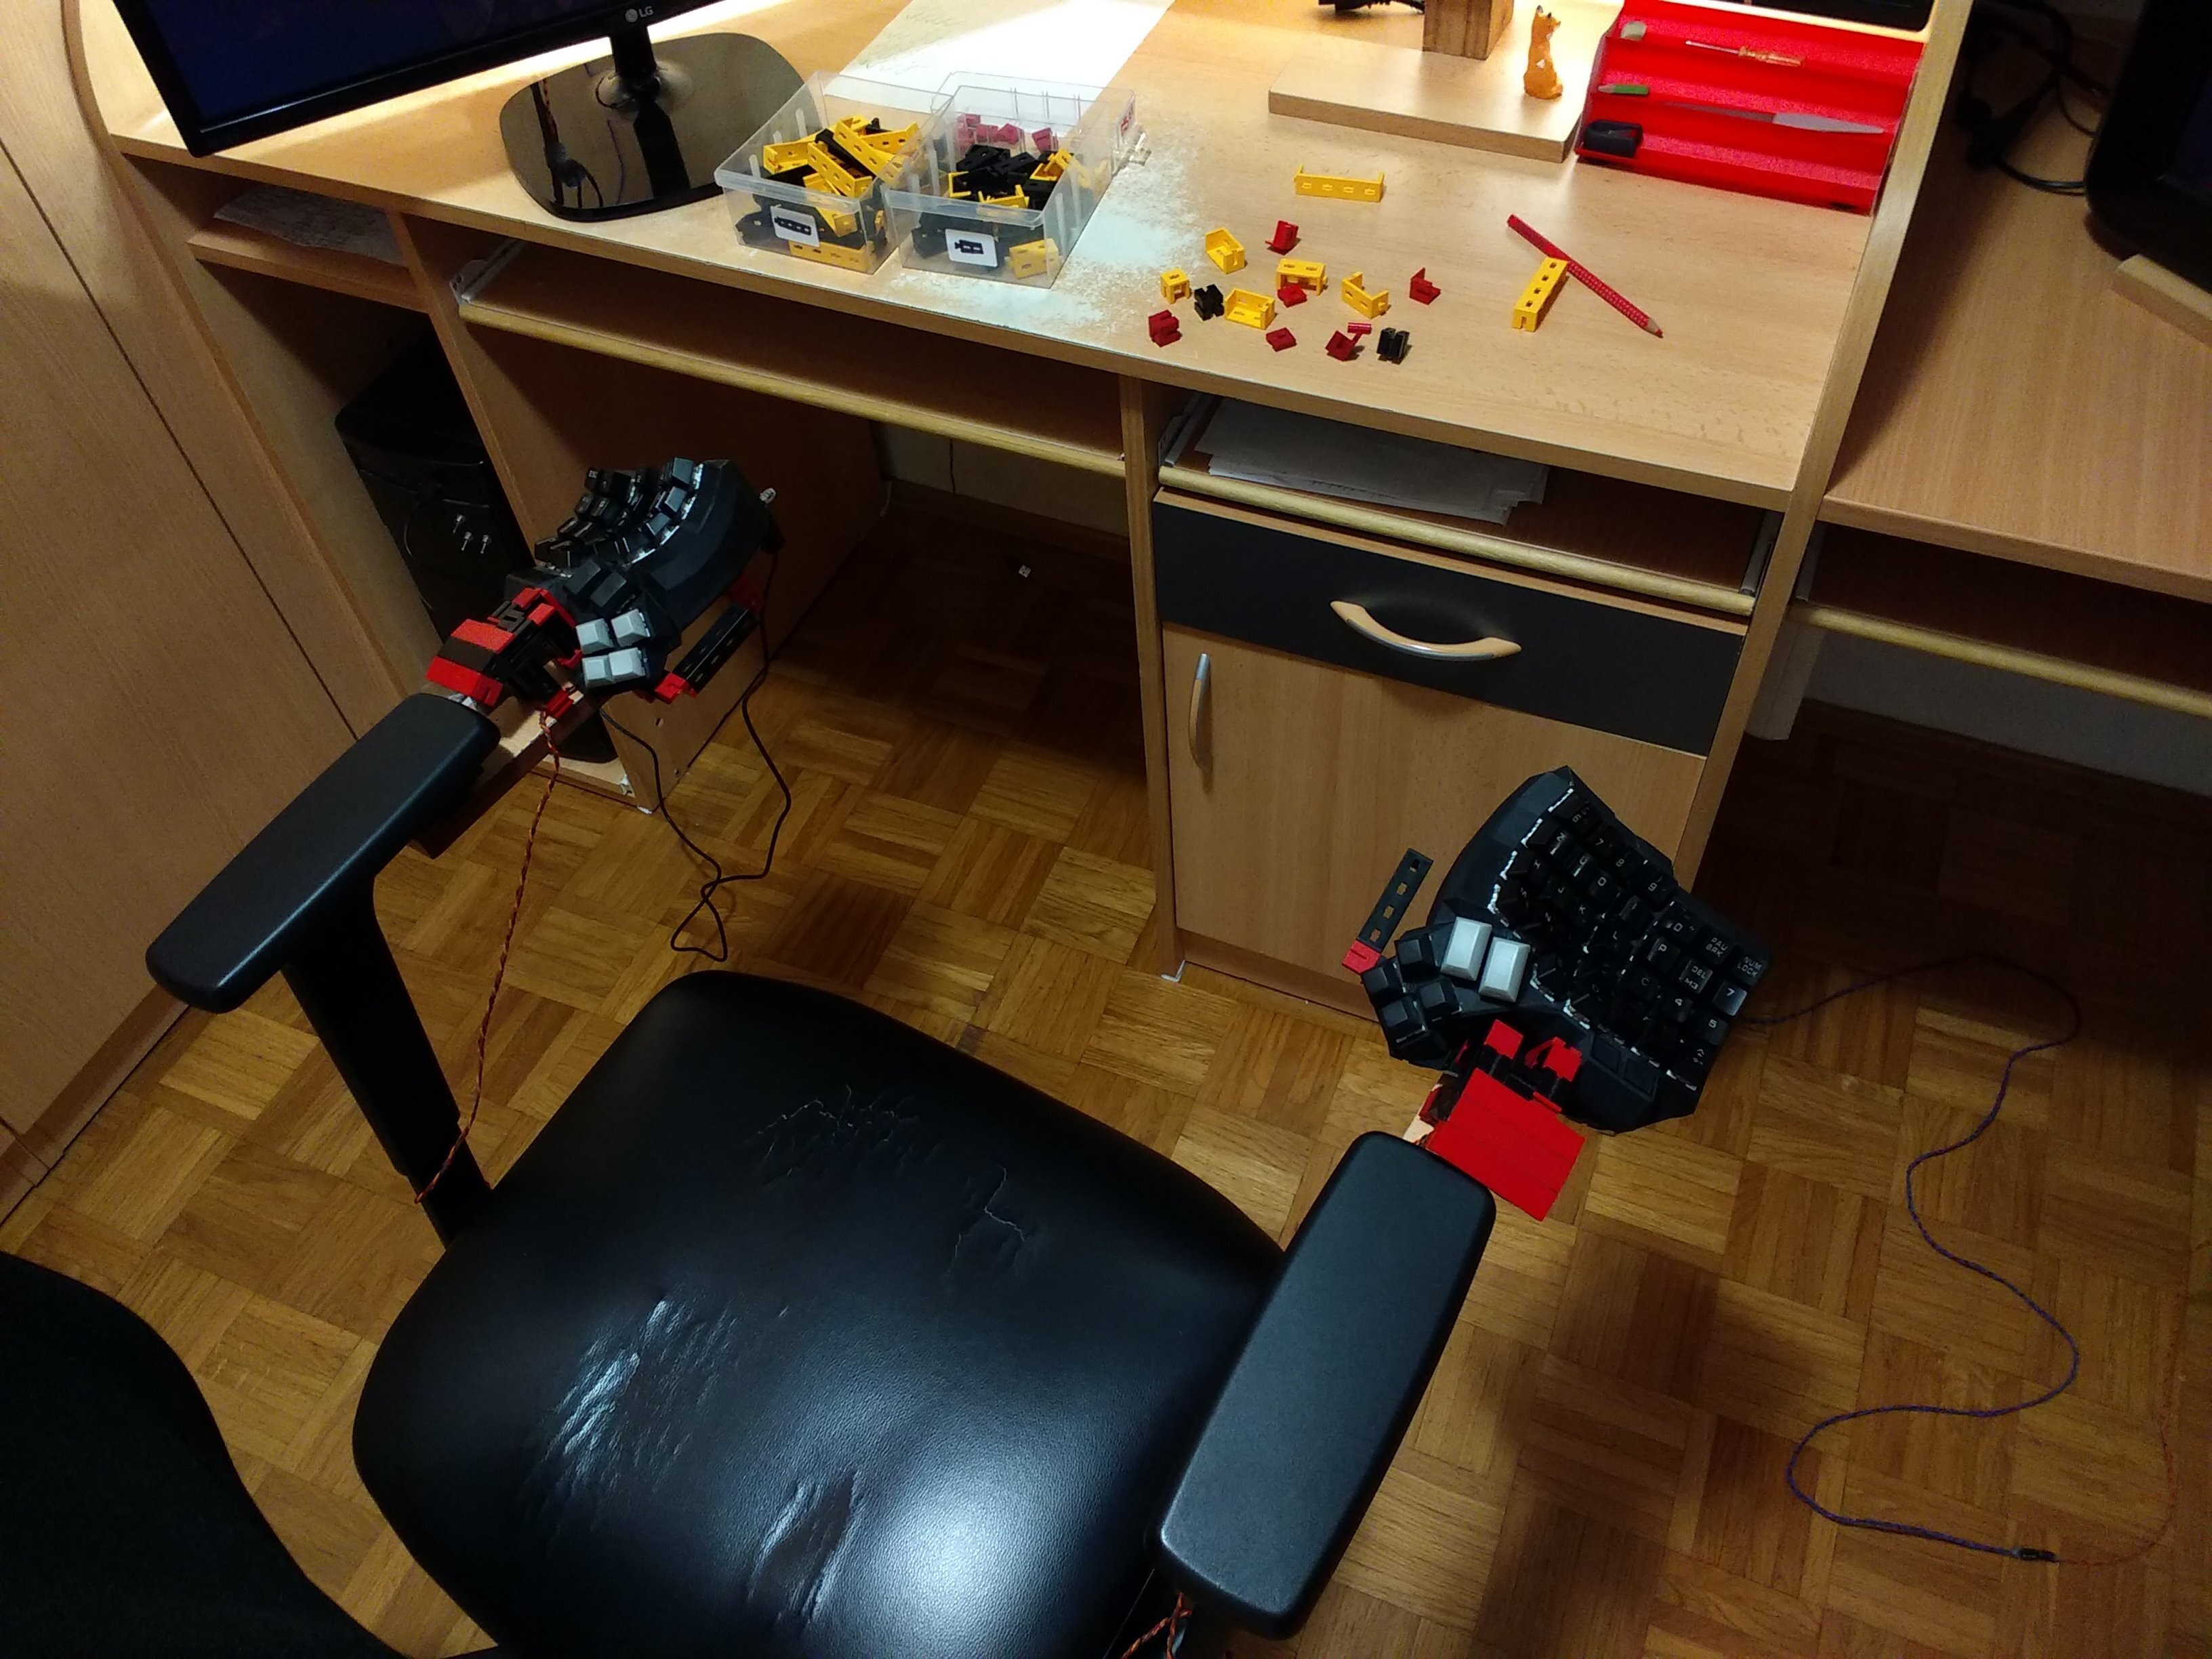
Prototype chair mount for this keyboard!
The idea for this was, that if you have multiple screens, it's better to have your keyboard on the chair, instead of on the desk. Otherwise you might need to turn your head for long periods of time. For someone like me with neck issues, it's better to turn the chair, hihi. Building blocks are great for prototyping!
UPDATE May 23, 2020:
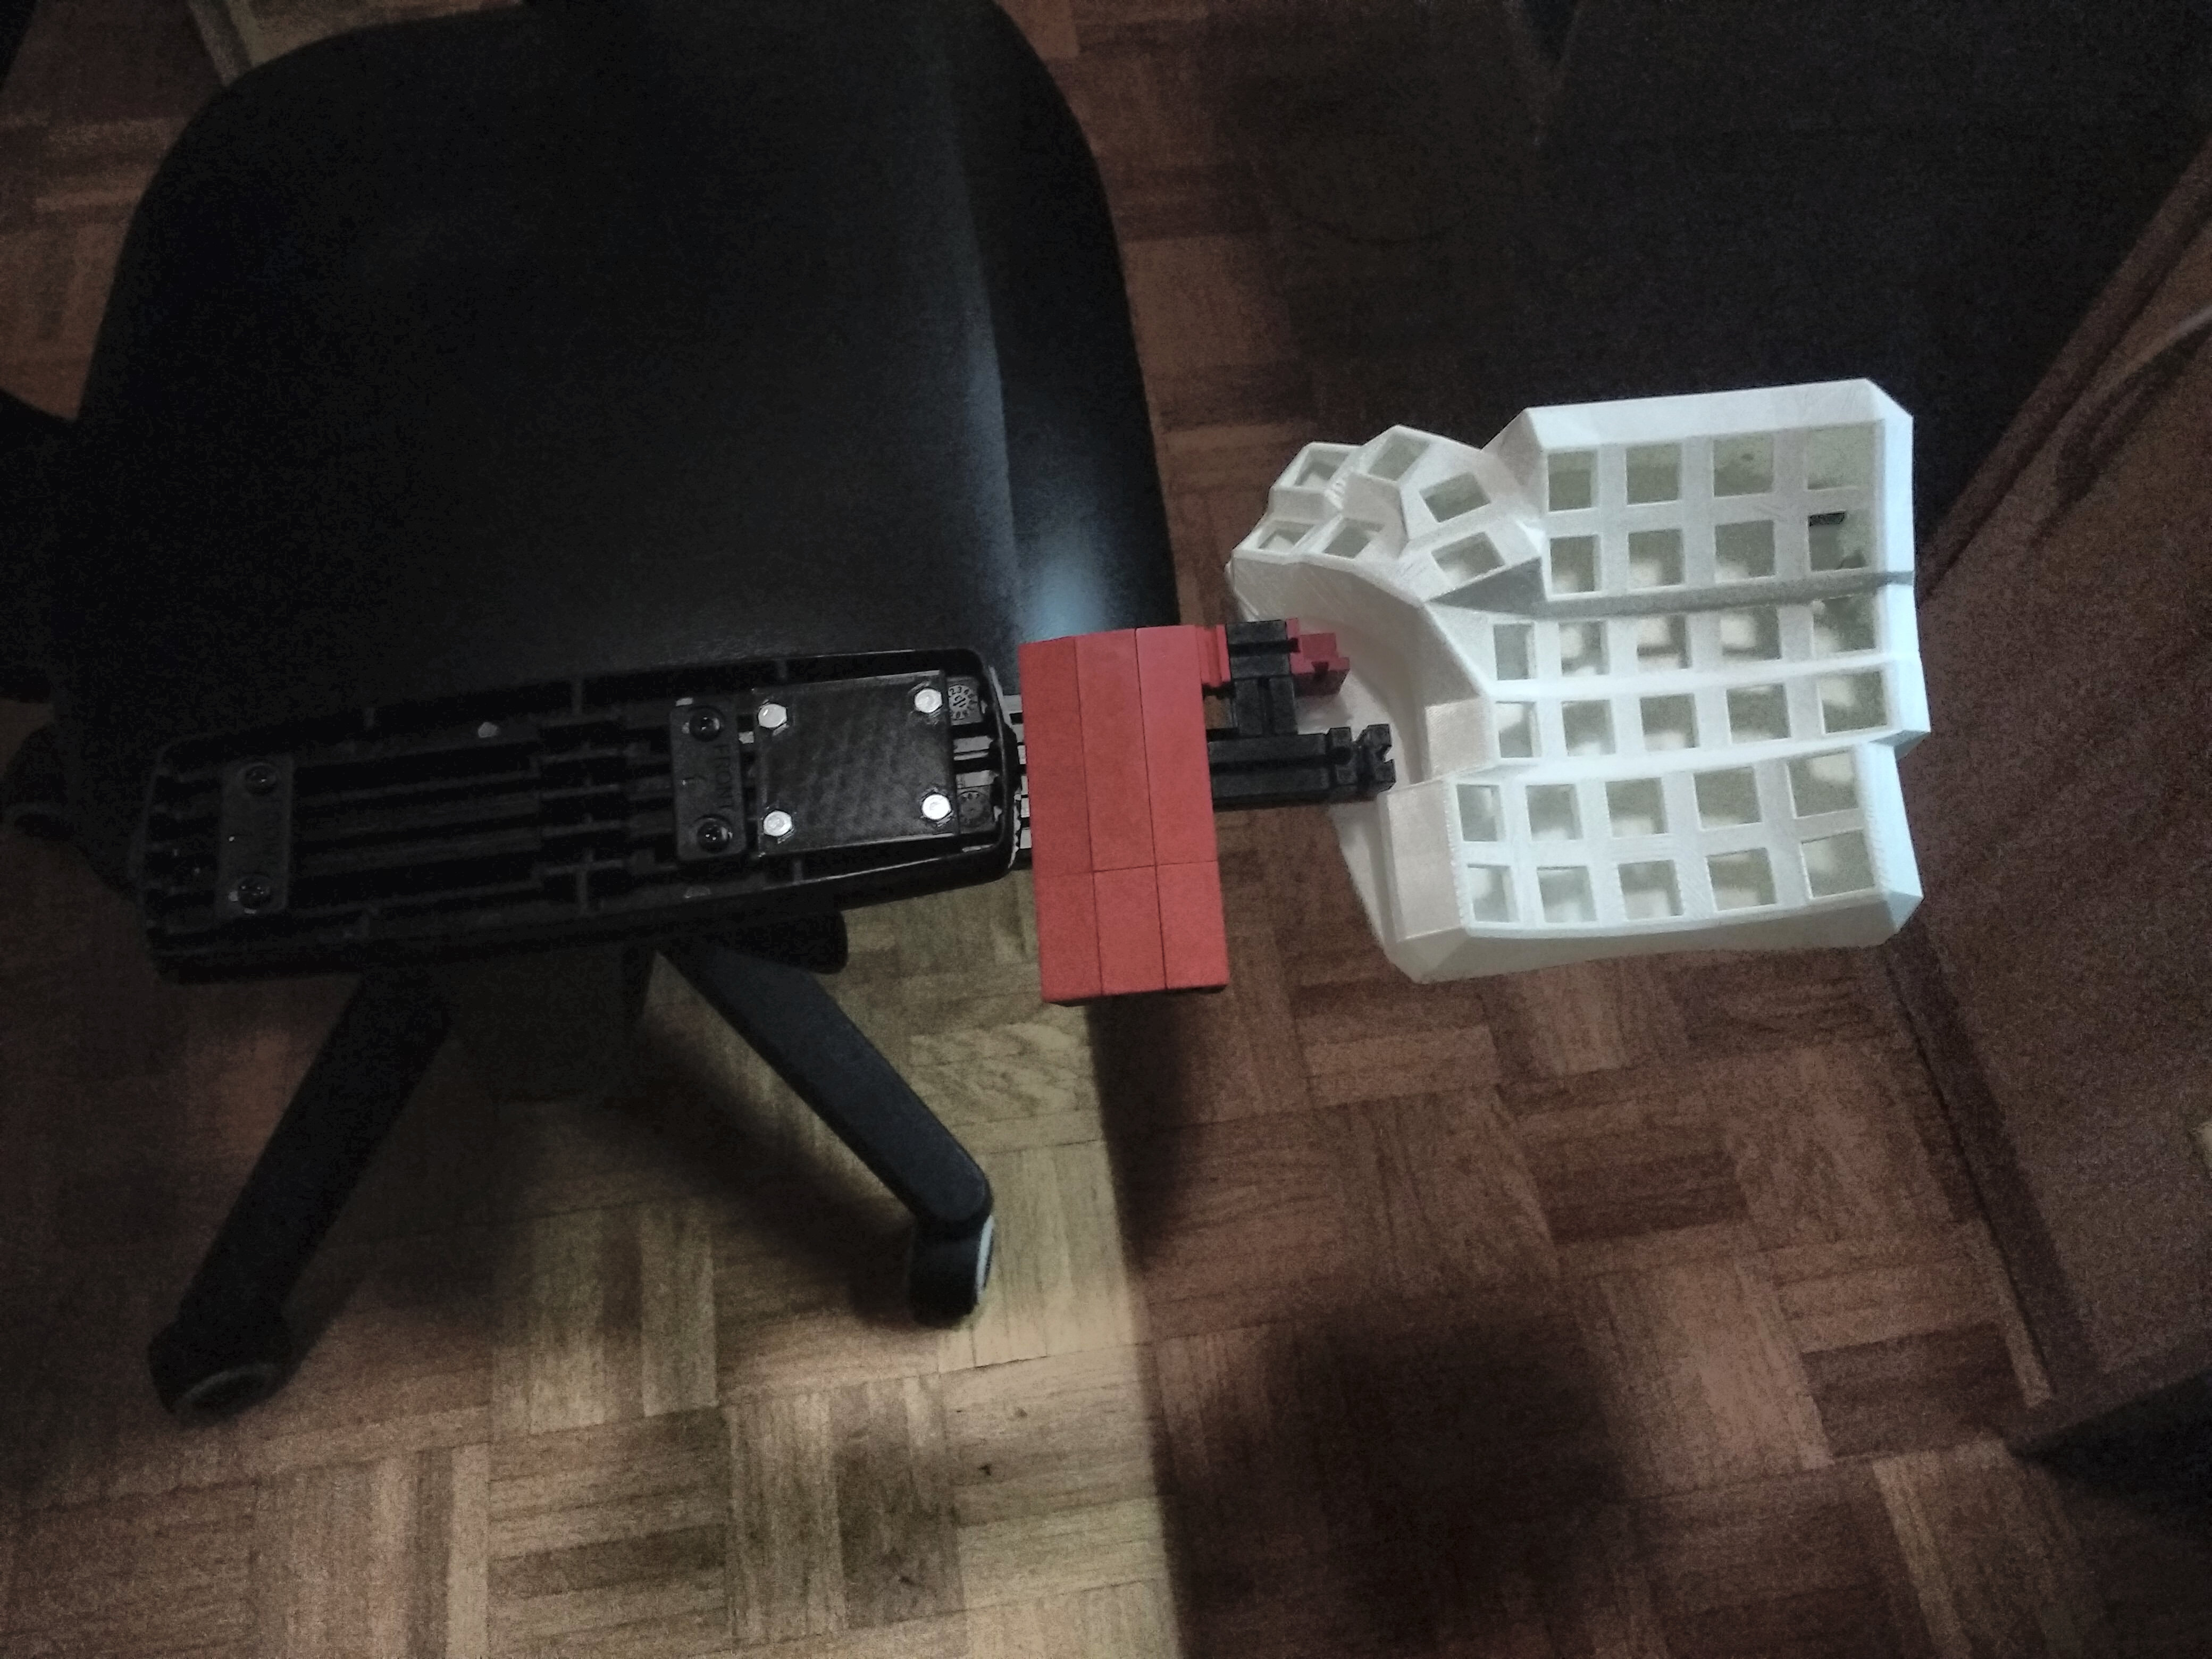
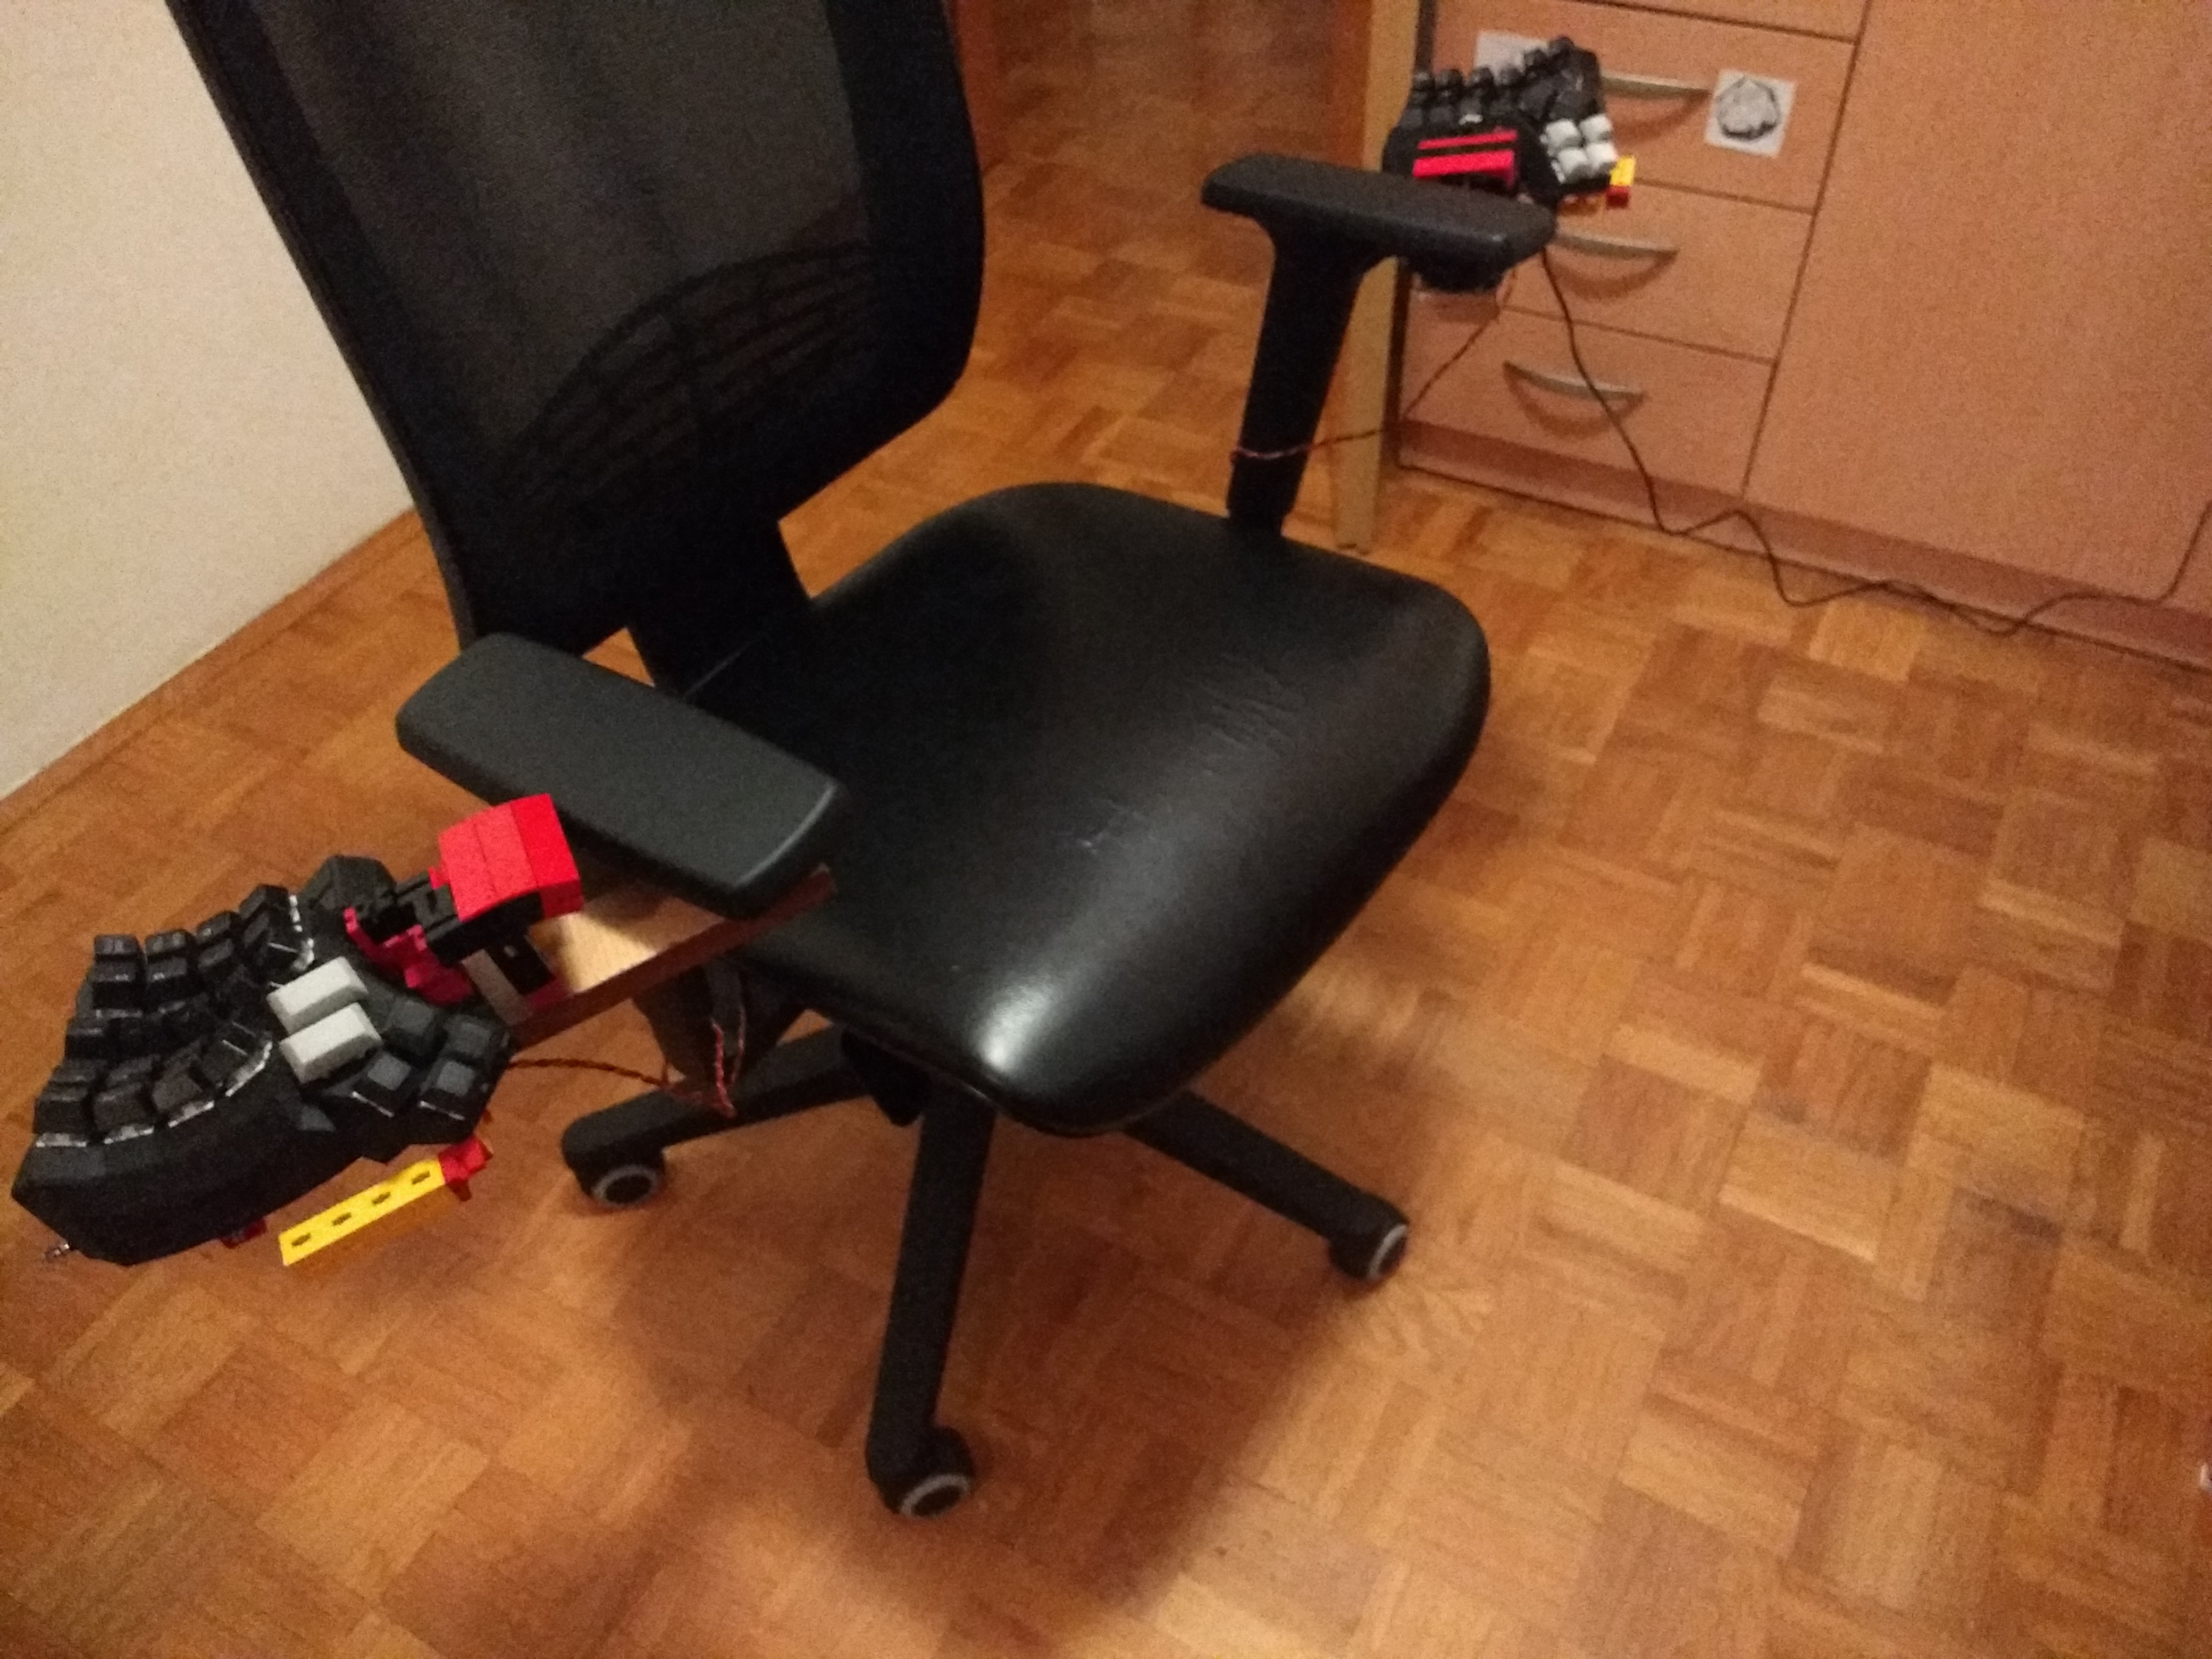
Better chair mount!
I tried a bunch of different things and this seems to be the best attachment method for this chair. It goes through the mechanism for adjusting the arm rests horizontally.
There's a 3D printed holder for the hex screws which prevents them from spining, so I can screw things on without needing to open the chair again. It is a very simple solution, I'm happy that I found it!
I think you should always keep trying to find simpler solutions whenever you are designing something. Because eventually, you'll find something that's so simple that it has barely any parts that could break or have negative side effects!
I still need to sort out the wire problem (I don't want a wireless keyboard), and then I'm set! I'm thinking, I might make the keyboard usb cable go from the chair's head rest straight to the ceiling of my room, because that'd be kinda cool, and it wouldn't be in the way of things!
UPDATE November 02, 2020:
Wired and working!
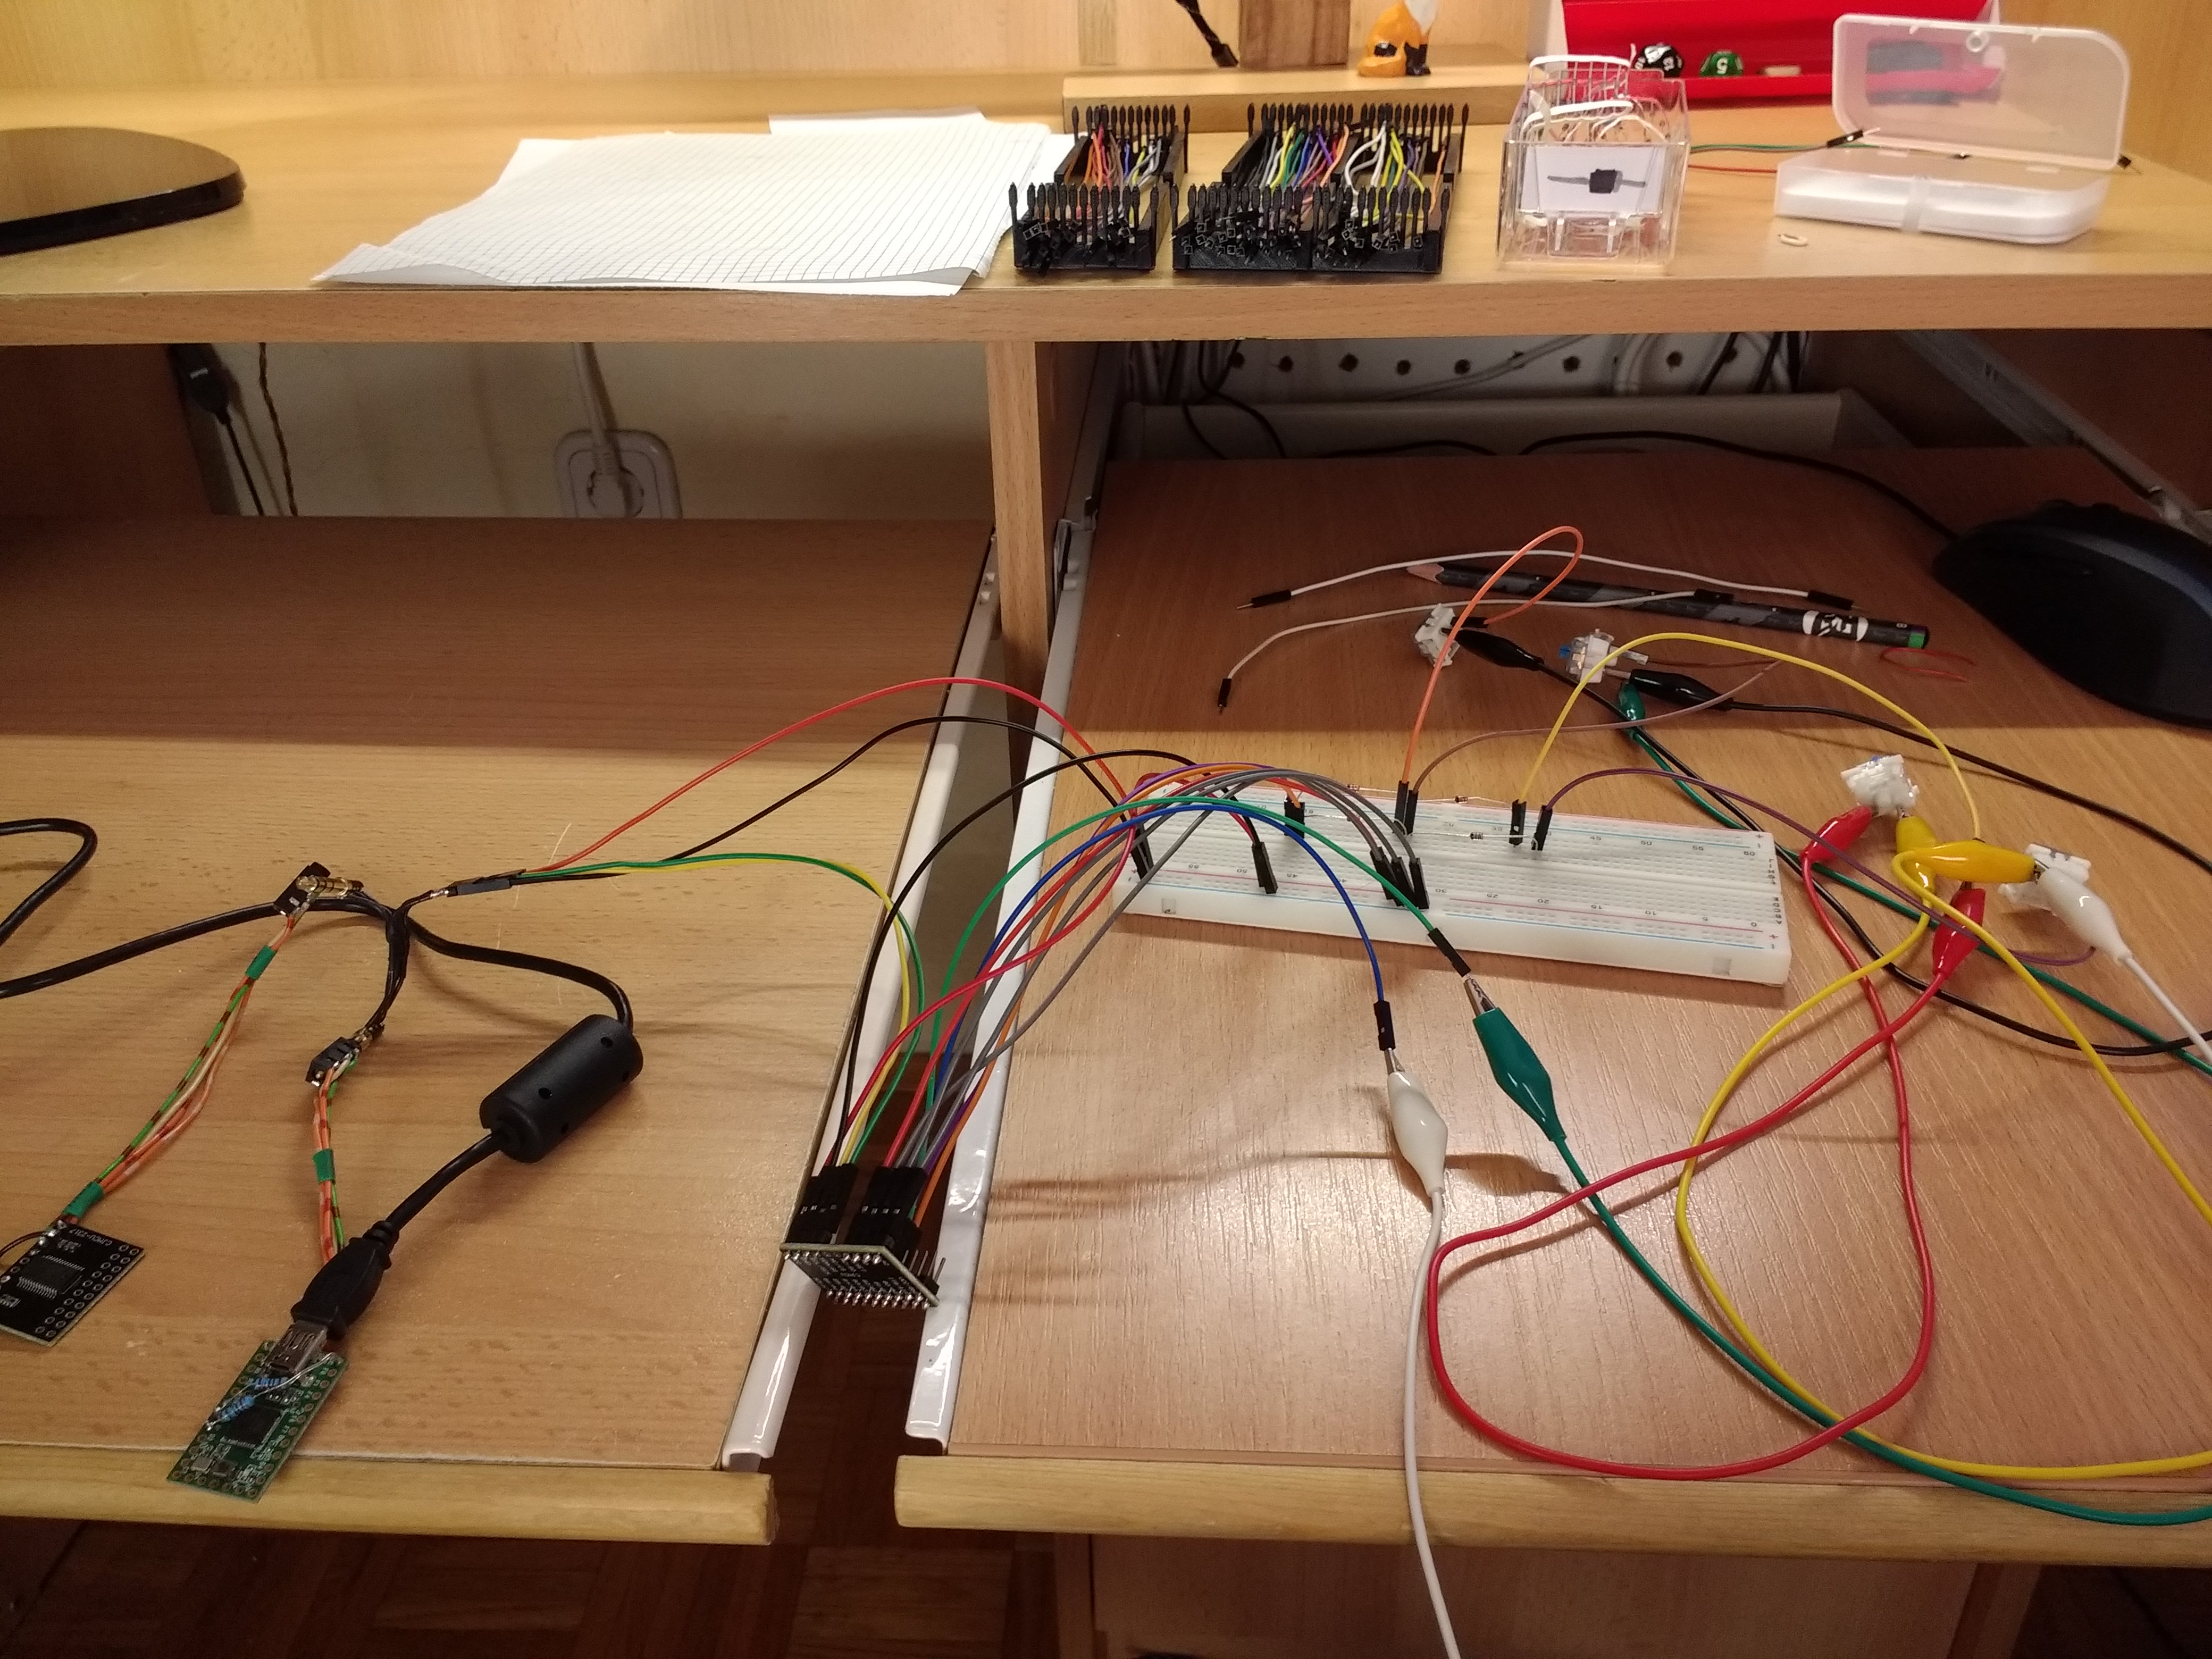
This is 5 months later; I procrastinated on this project for a long time but now I finally did something! I loaded up qmk firmware on my Teensy and connected the MCP23018 over I2C (this represents the other half of the keyboard).
On the image you can see how I connected 4 switches to the MCP23018 to test what's the correct way to arrange the pins and the diodes.
Later that day ...
Once that was working right, I knew how to wire the keyboards. It was the row-driven design.
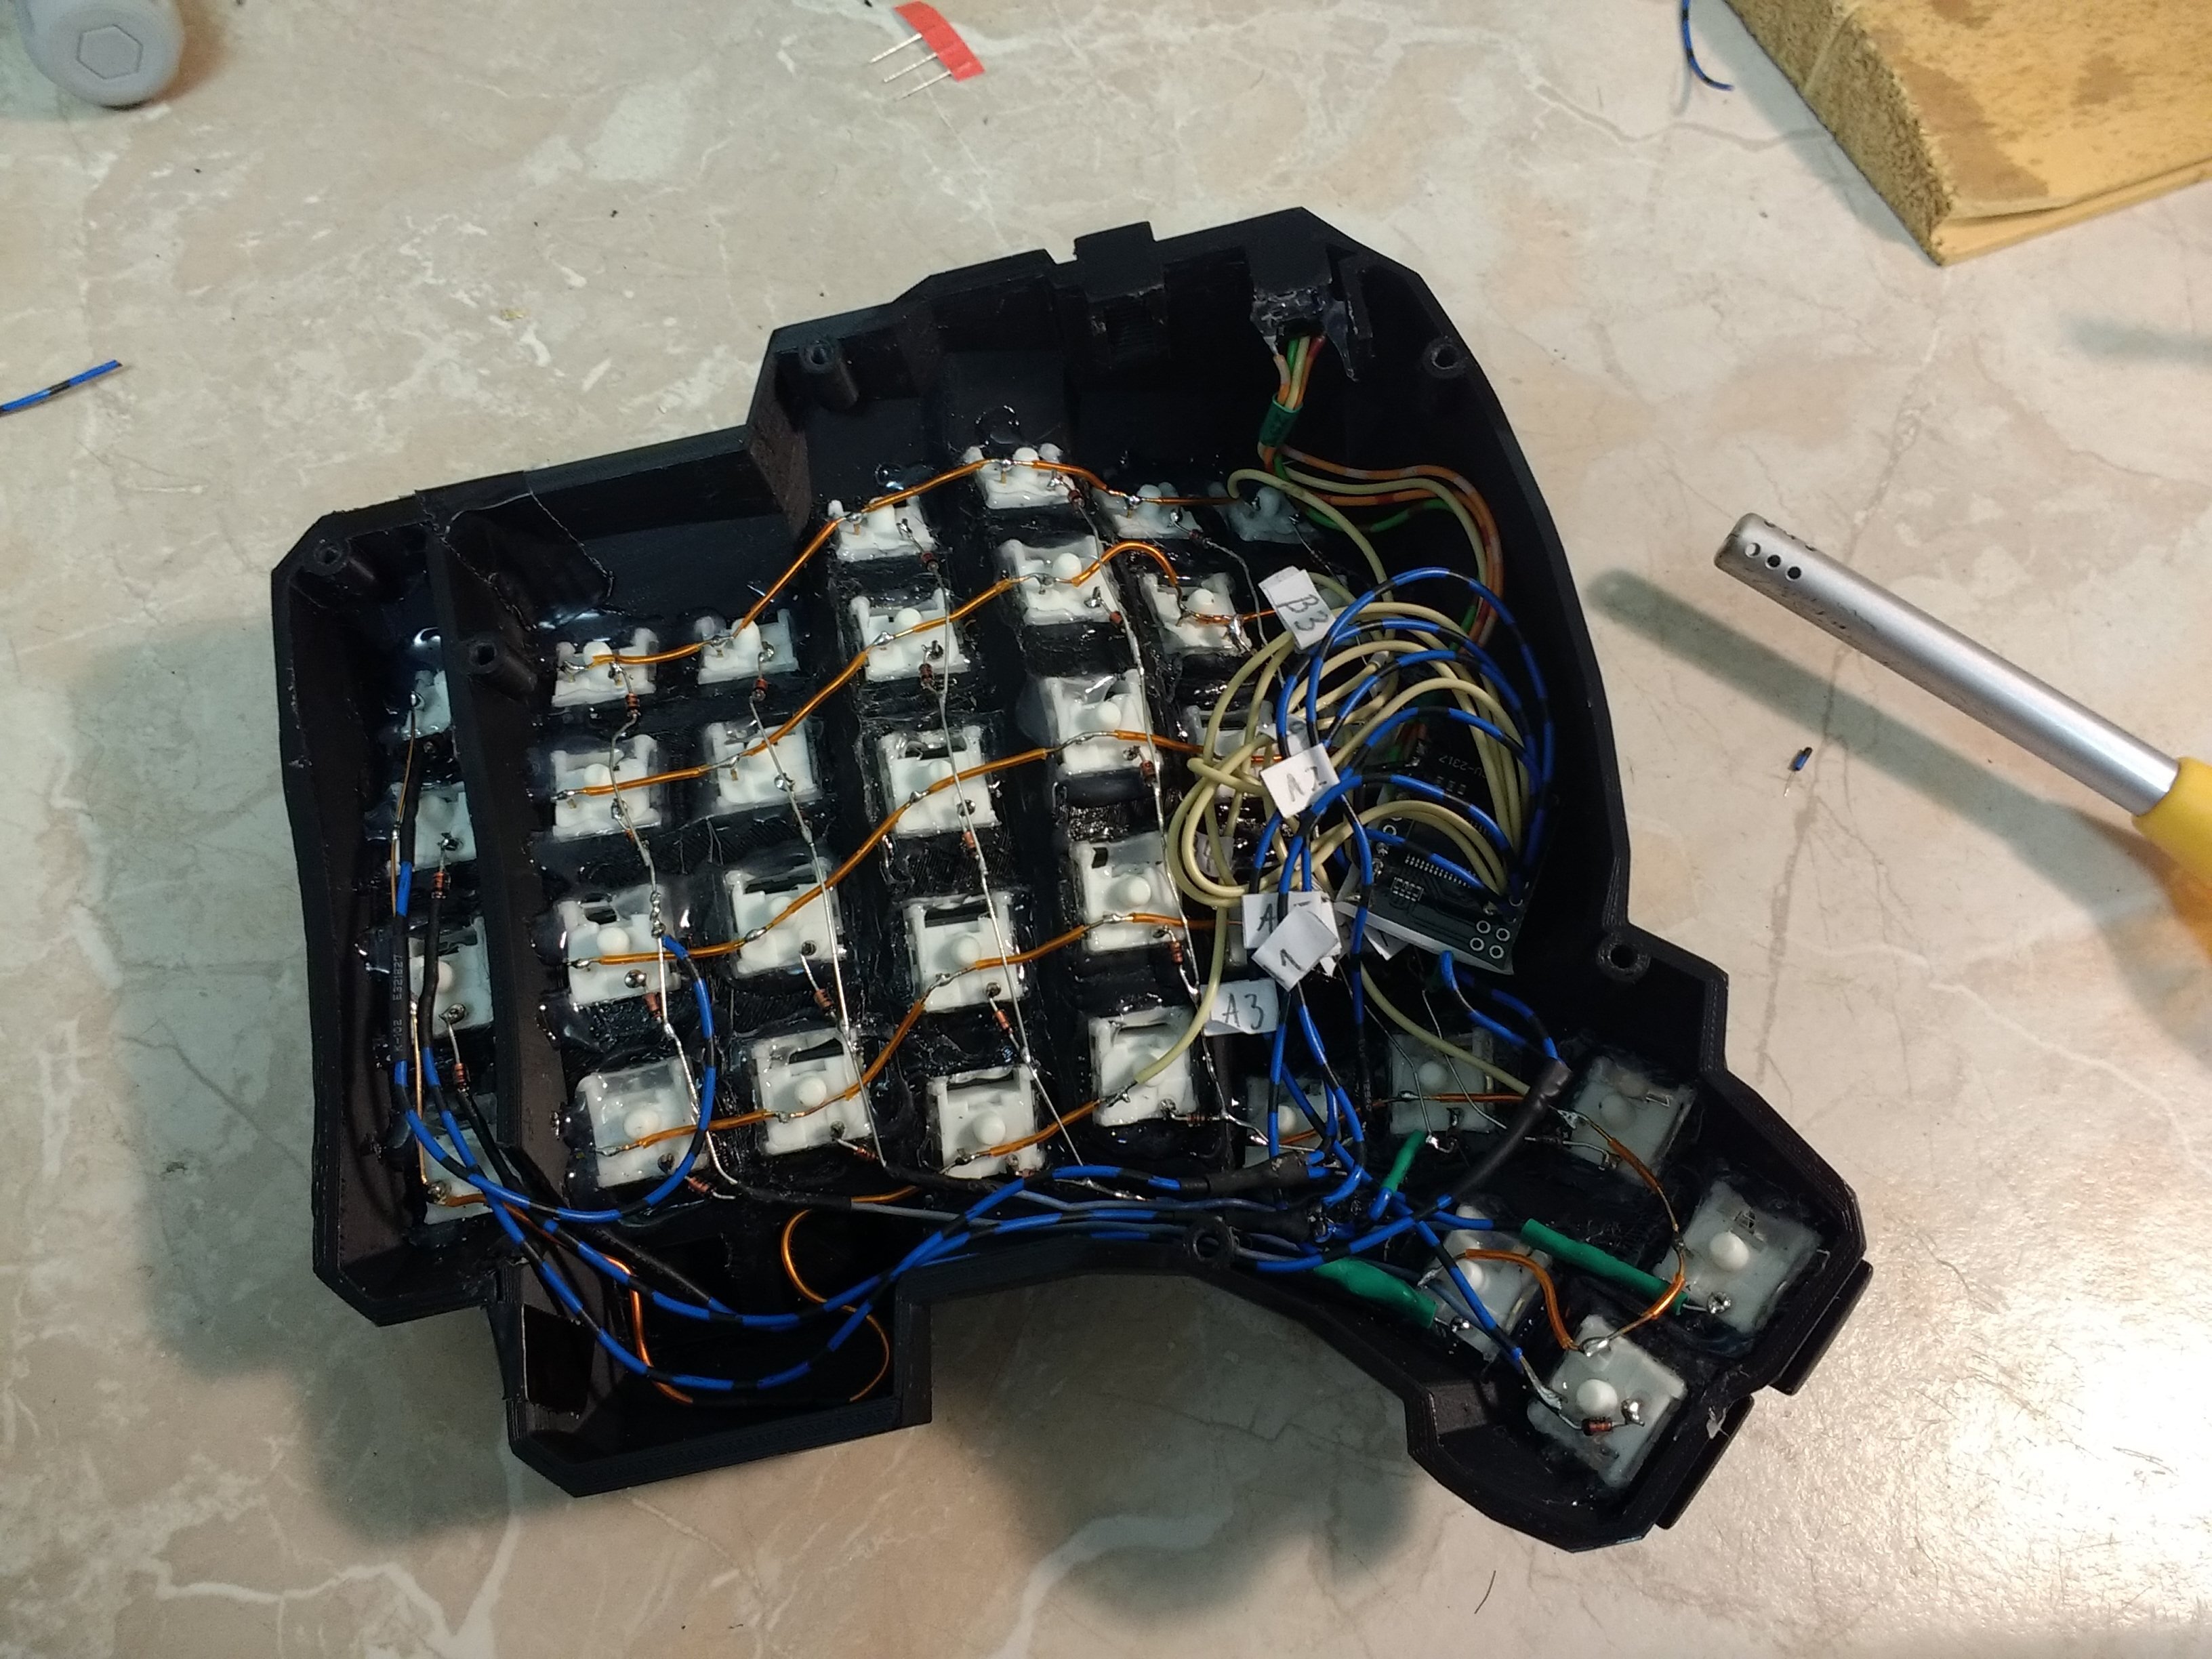
I soldered the wires and diodes on to my switches. I also hot-glued all the switches in place because the plastic itself was not firm enough, keys were still falling out sometimes!
With the wired keys, I was able to put together a test for checking which pin is correct for which row and which column. These things are in guides, but I always like to double check!

Finishing up the wiring
I labeled all the wires to make sure I don't forget the order.
Then I soldered the wires directly to the chips. I could have made them detachable, but in this situation, that is actually a bad thing. I don't want my keyboard randomly detaching itself on the inside.
And even when it's soldered, it is still "detachable" enough that I can change it if I want.

Finally mounted
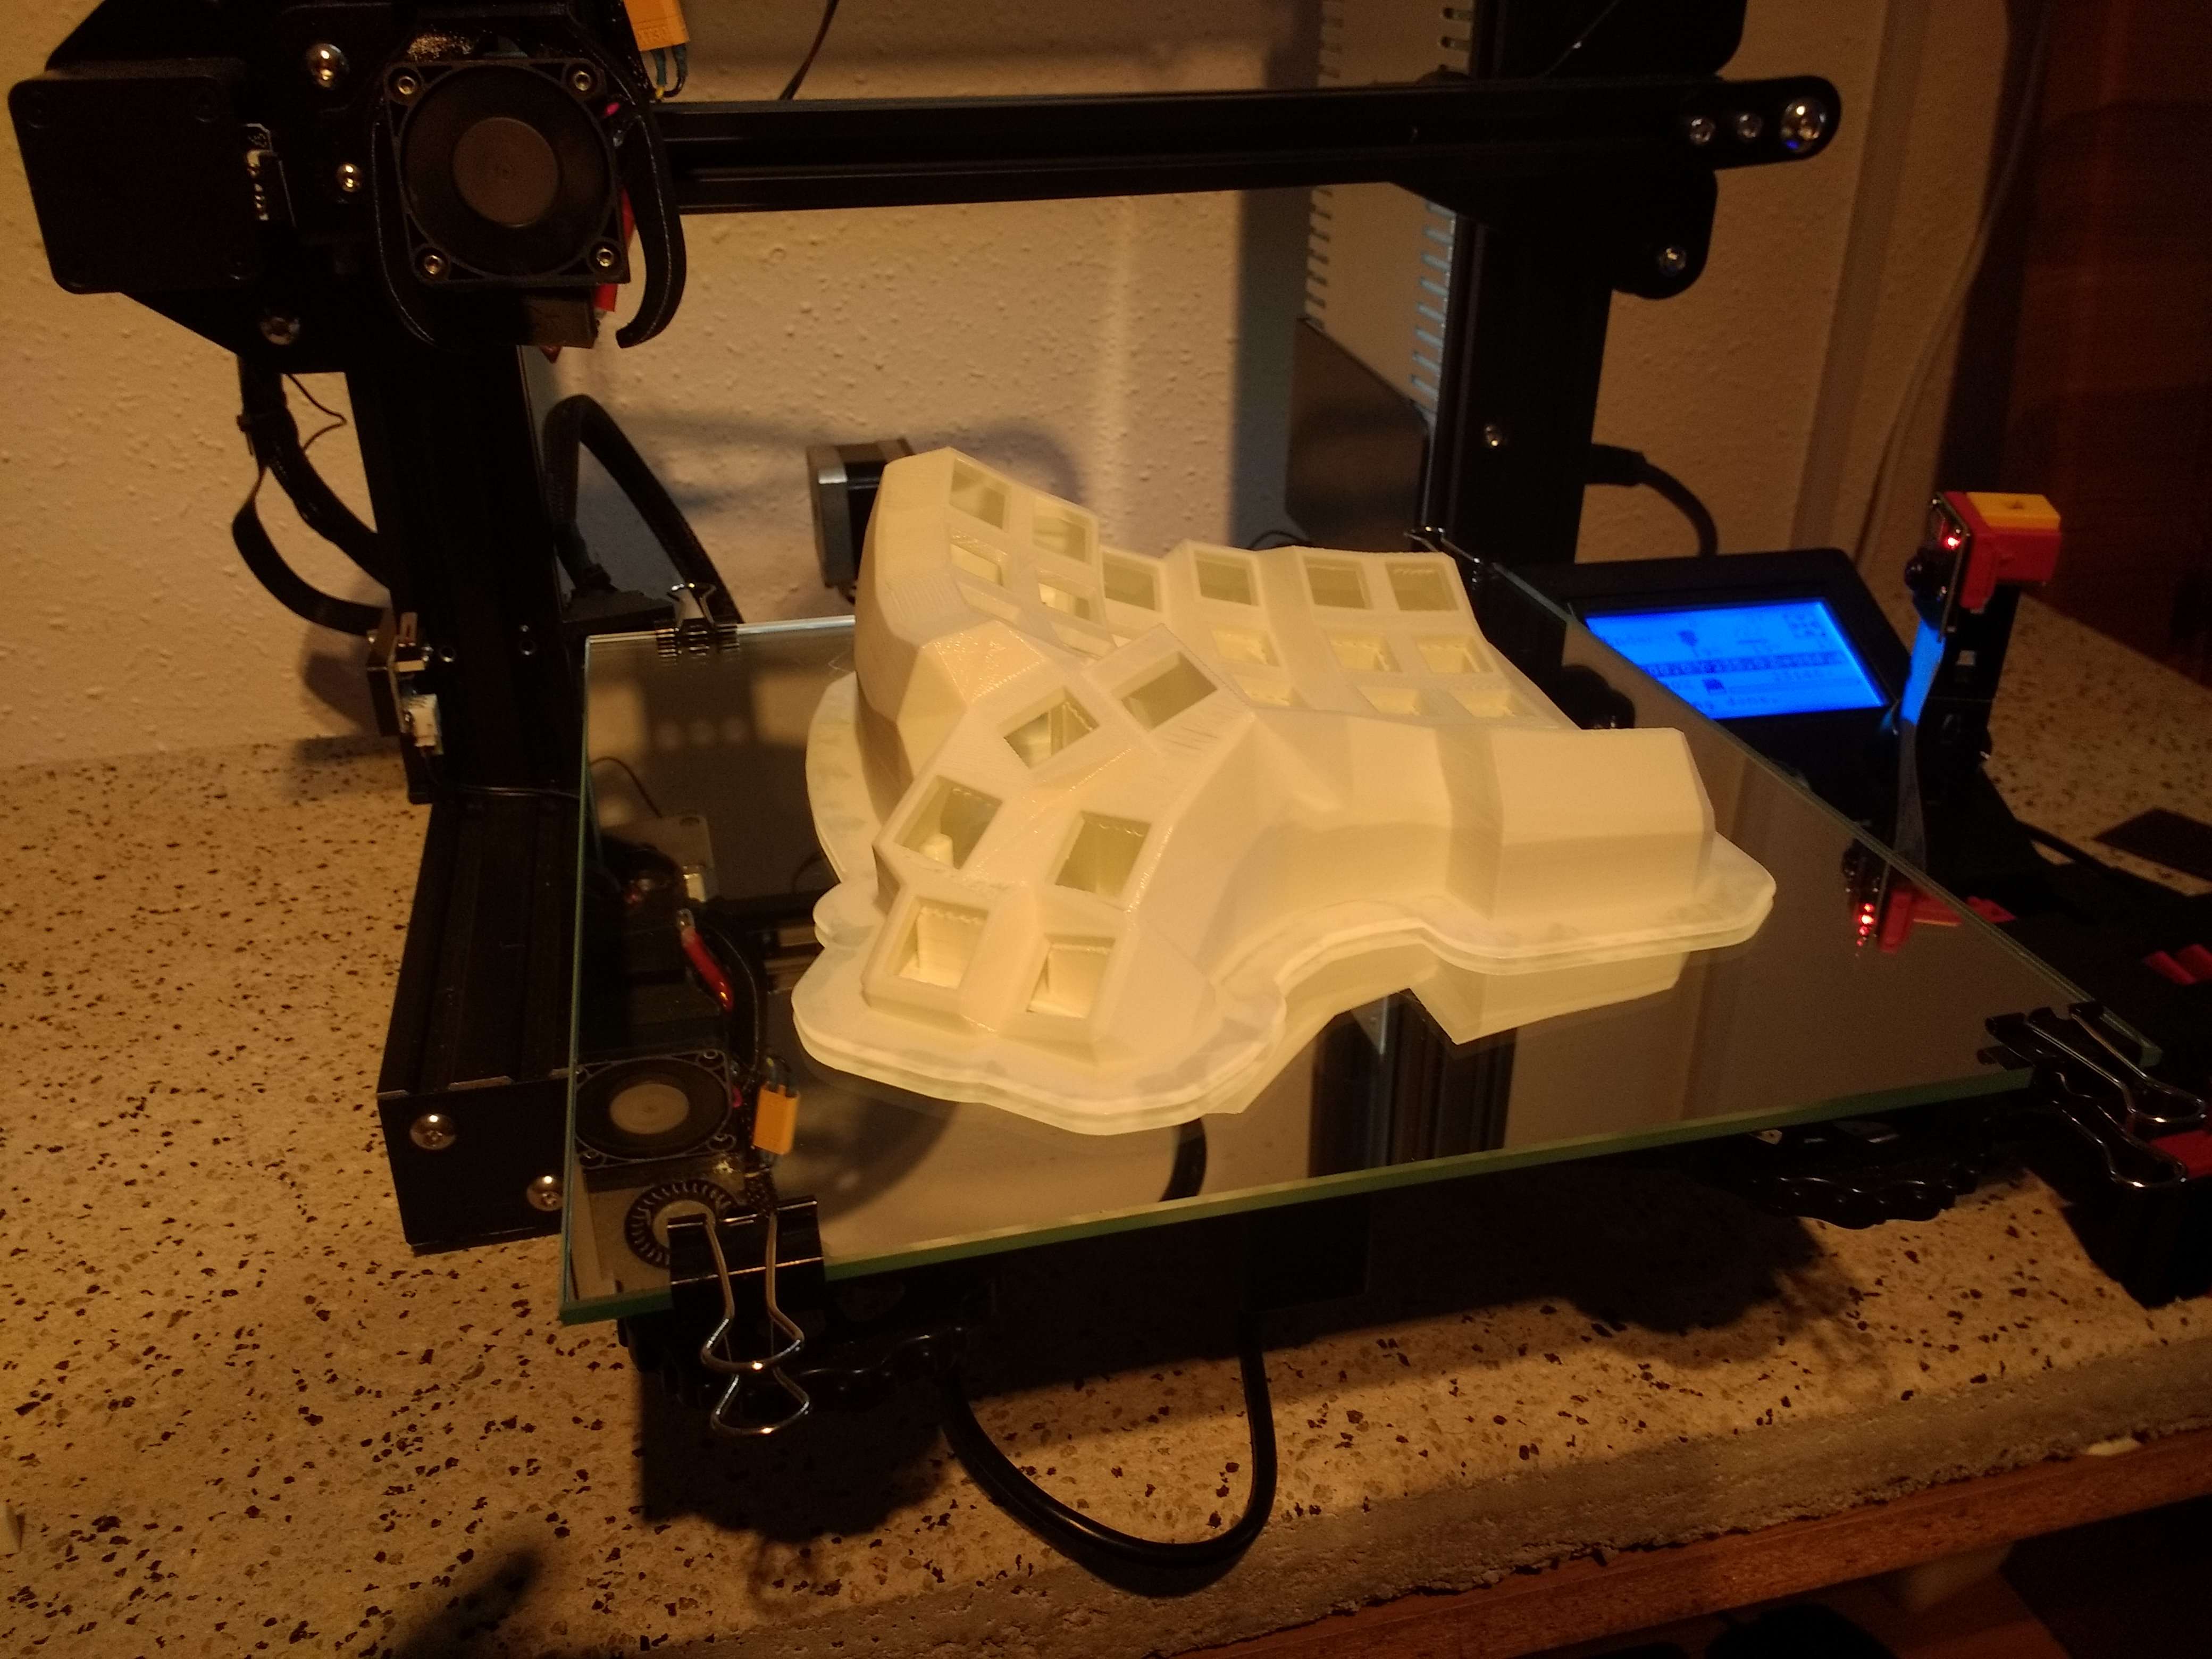
I custom-designed a bottom cover that can be 3D printed and attached with screws.
The cover has Fischertechnick rails. And then I use building blocks for attaching the keyboard to my chair. Plus it has customizable wrist rests!
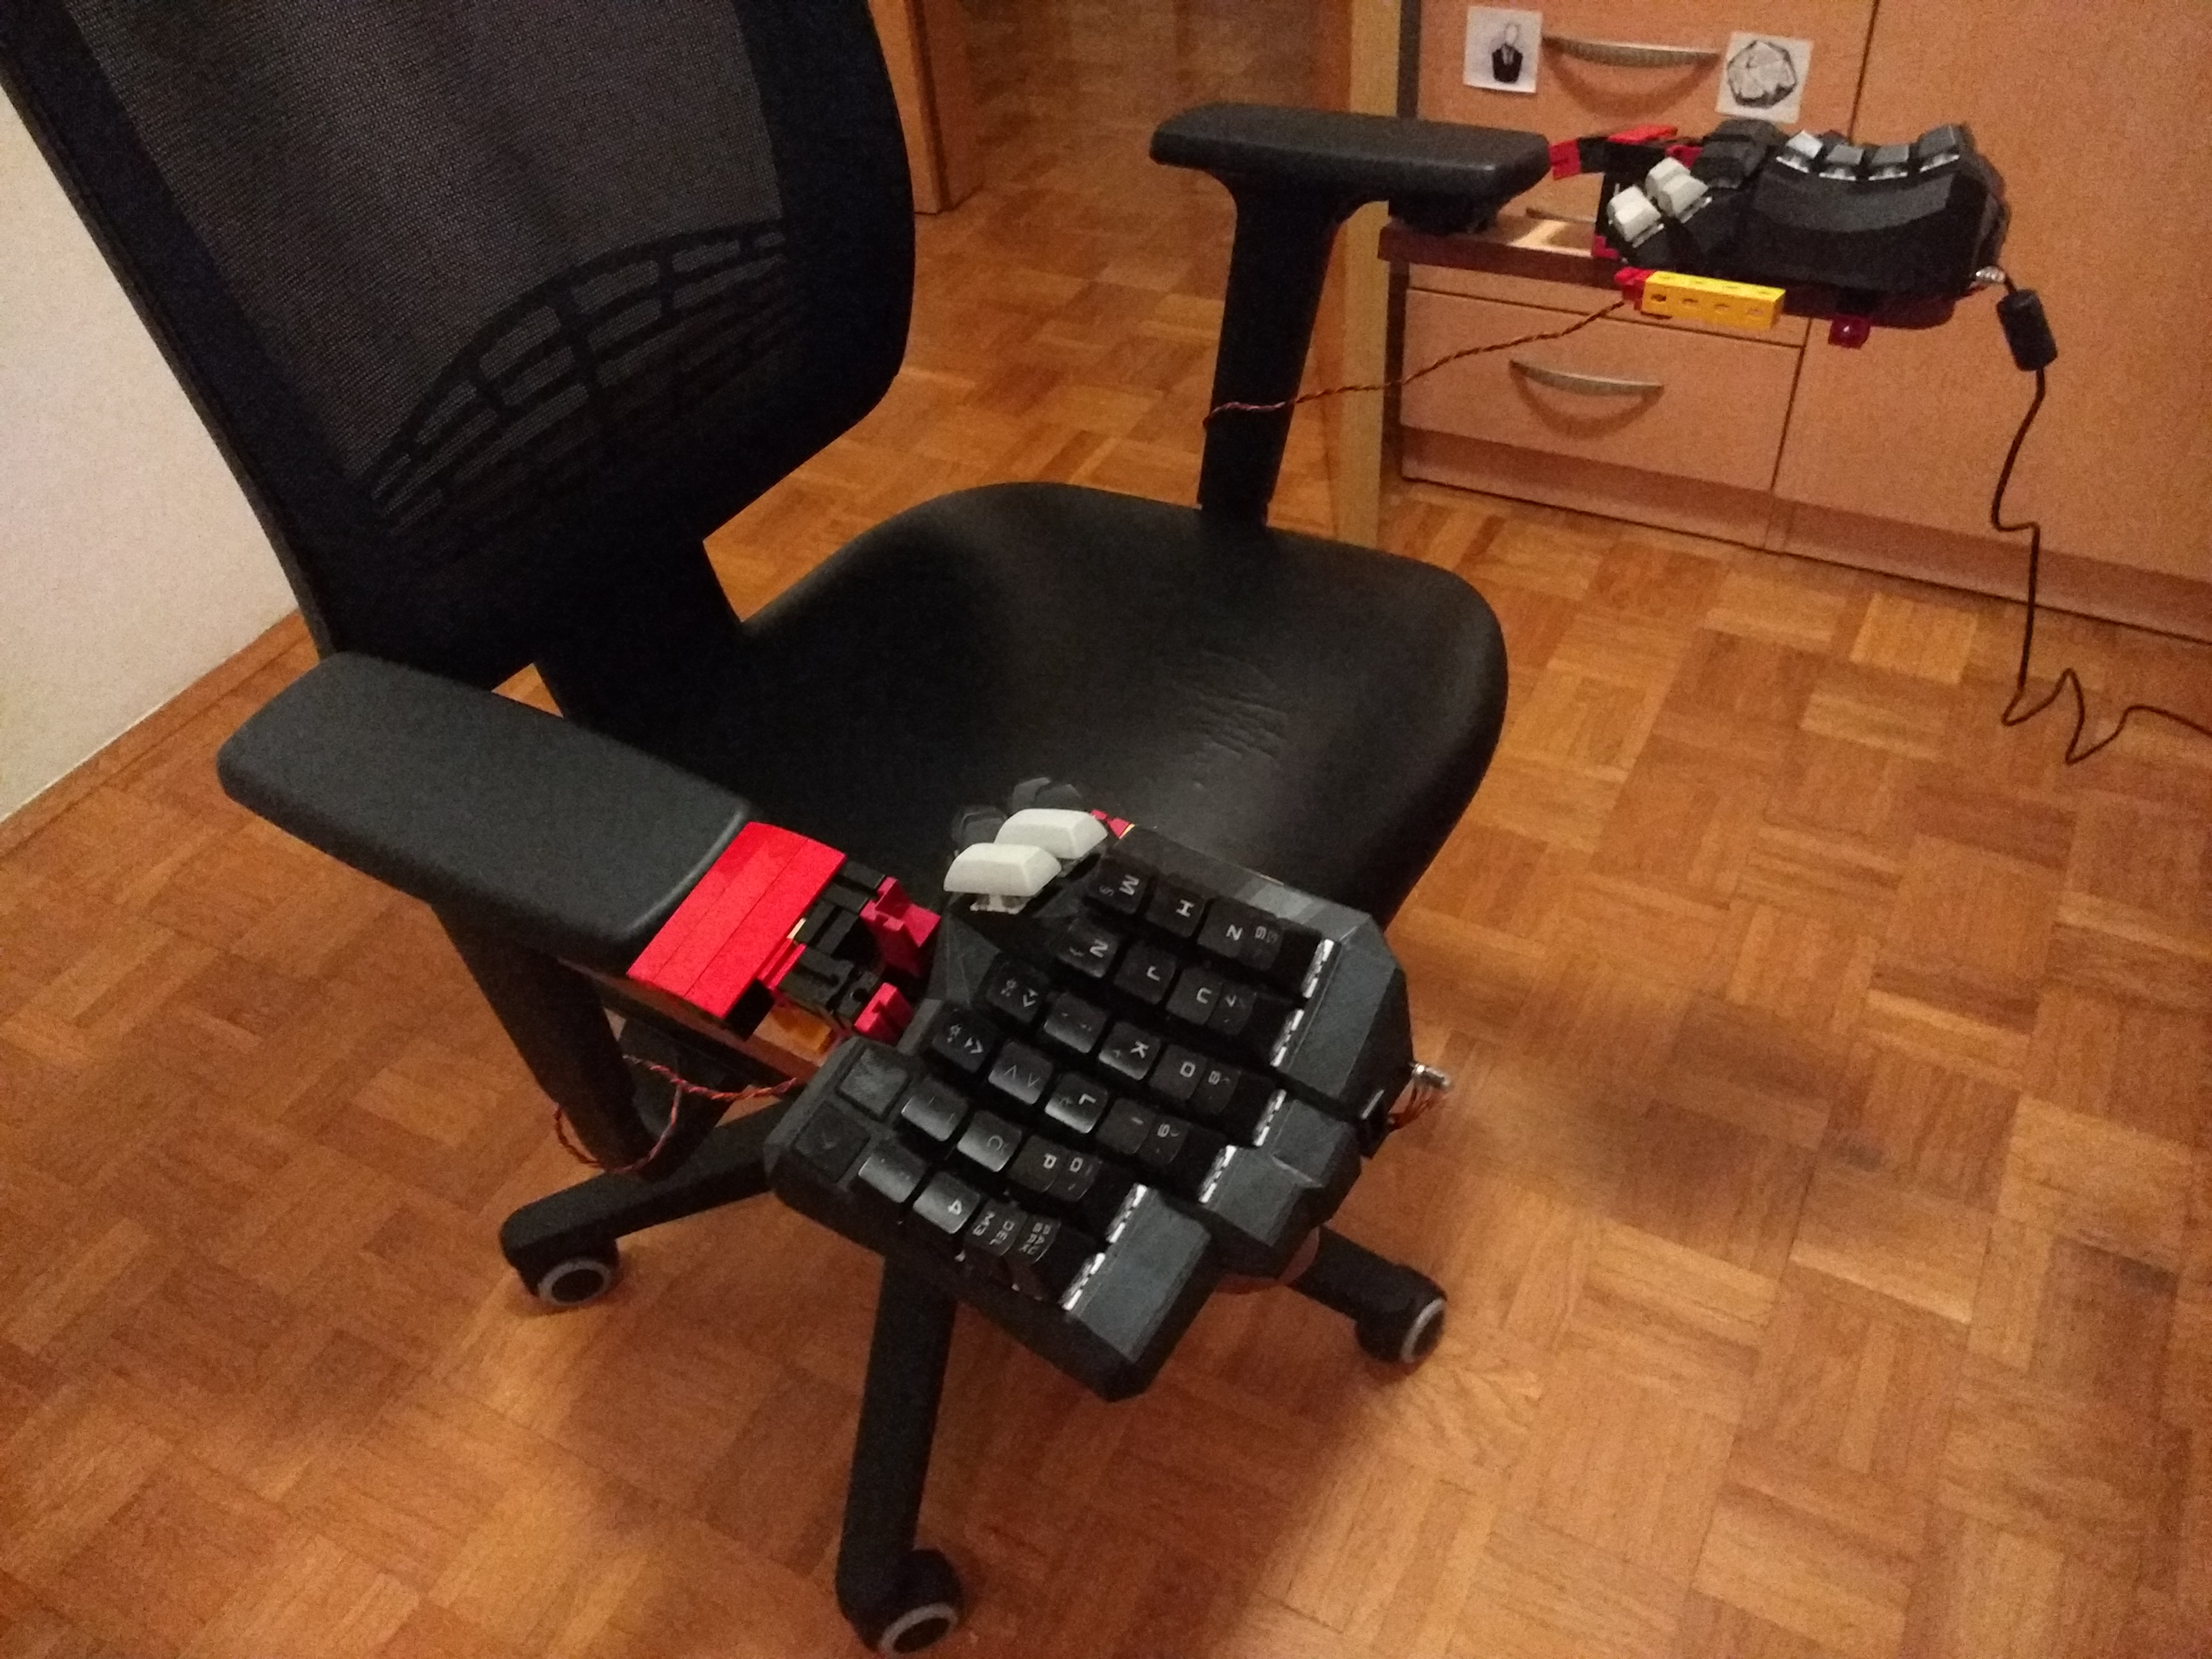
And it can do this!
UPDATE July 20, 2021:
It's expansion time! I decided I want 4 more keys on the right keyboard. A whole extra column!
I had a WIP photo of the unfinished wiring but I accidentally deleted it so have this instead, hihi. I printed a case for an extra 4 keys that fits perfectly and I made a little cut in the side of the previous wall to run wires here. In the wiring, these four keys fit in the remaining spots in the matrix, makig it a perfect logical 6 by 6 keypad!
I only expanded the right keyboard half. I don't need extra keys on the left (for now).
I designed and printed a slightly bigger plate to fit. It looks like it was meant to be there!
Pay no attention to the key labels. The actual key layout is based on Ergodox US, but quite modified.
The new row I just added hosts =, ], \ and right alt. Also F12, and probably other things soon!
And finally
It's time to release these files! I'm happy with the 3D printing part of the project. If I ever do want to add an extra column on the left, I will just re-use these same files. So I'm done with modeling!
UPDATE August 02, 2021:
I'm finally addressing the wire problem by building a crane for the wire!

UPDATE April 03, 2022:
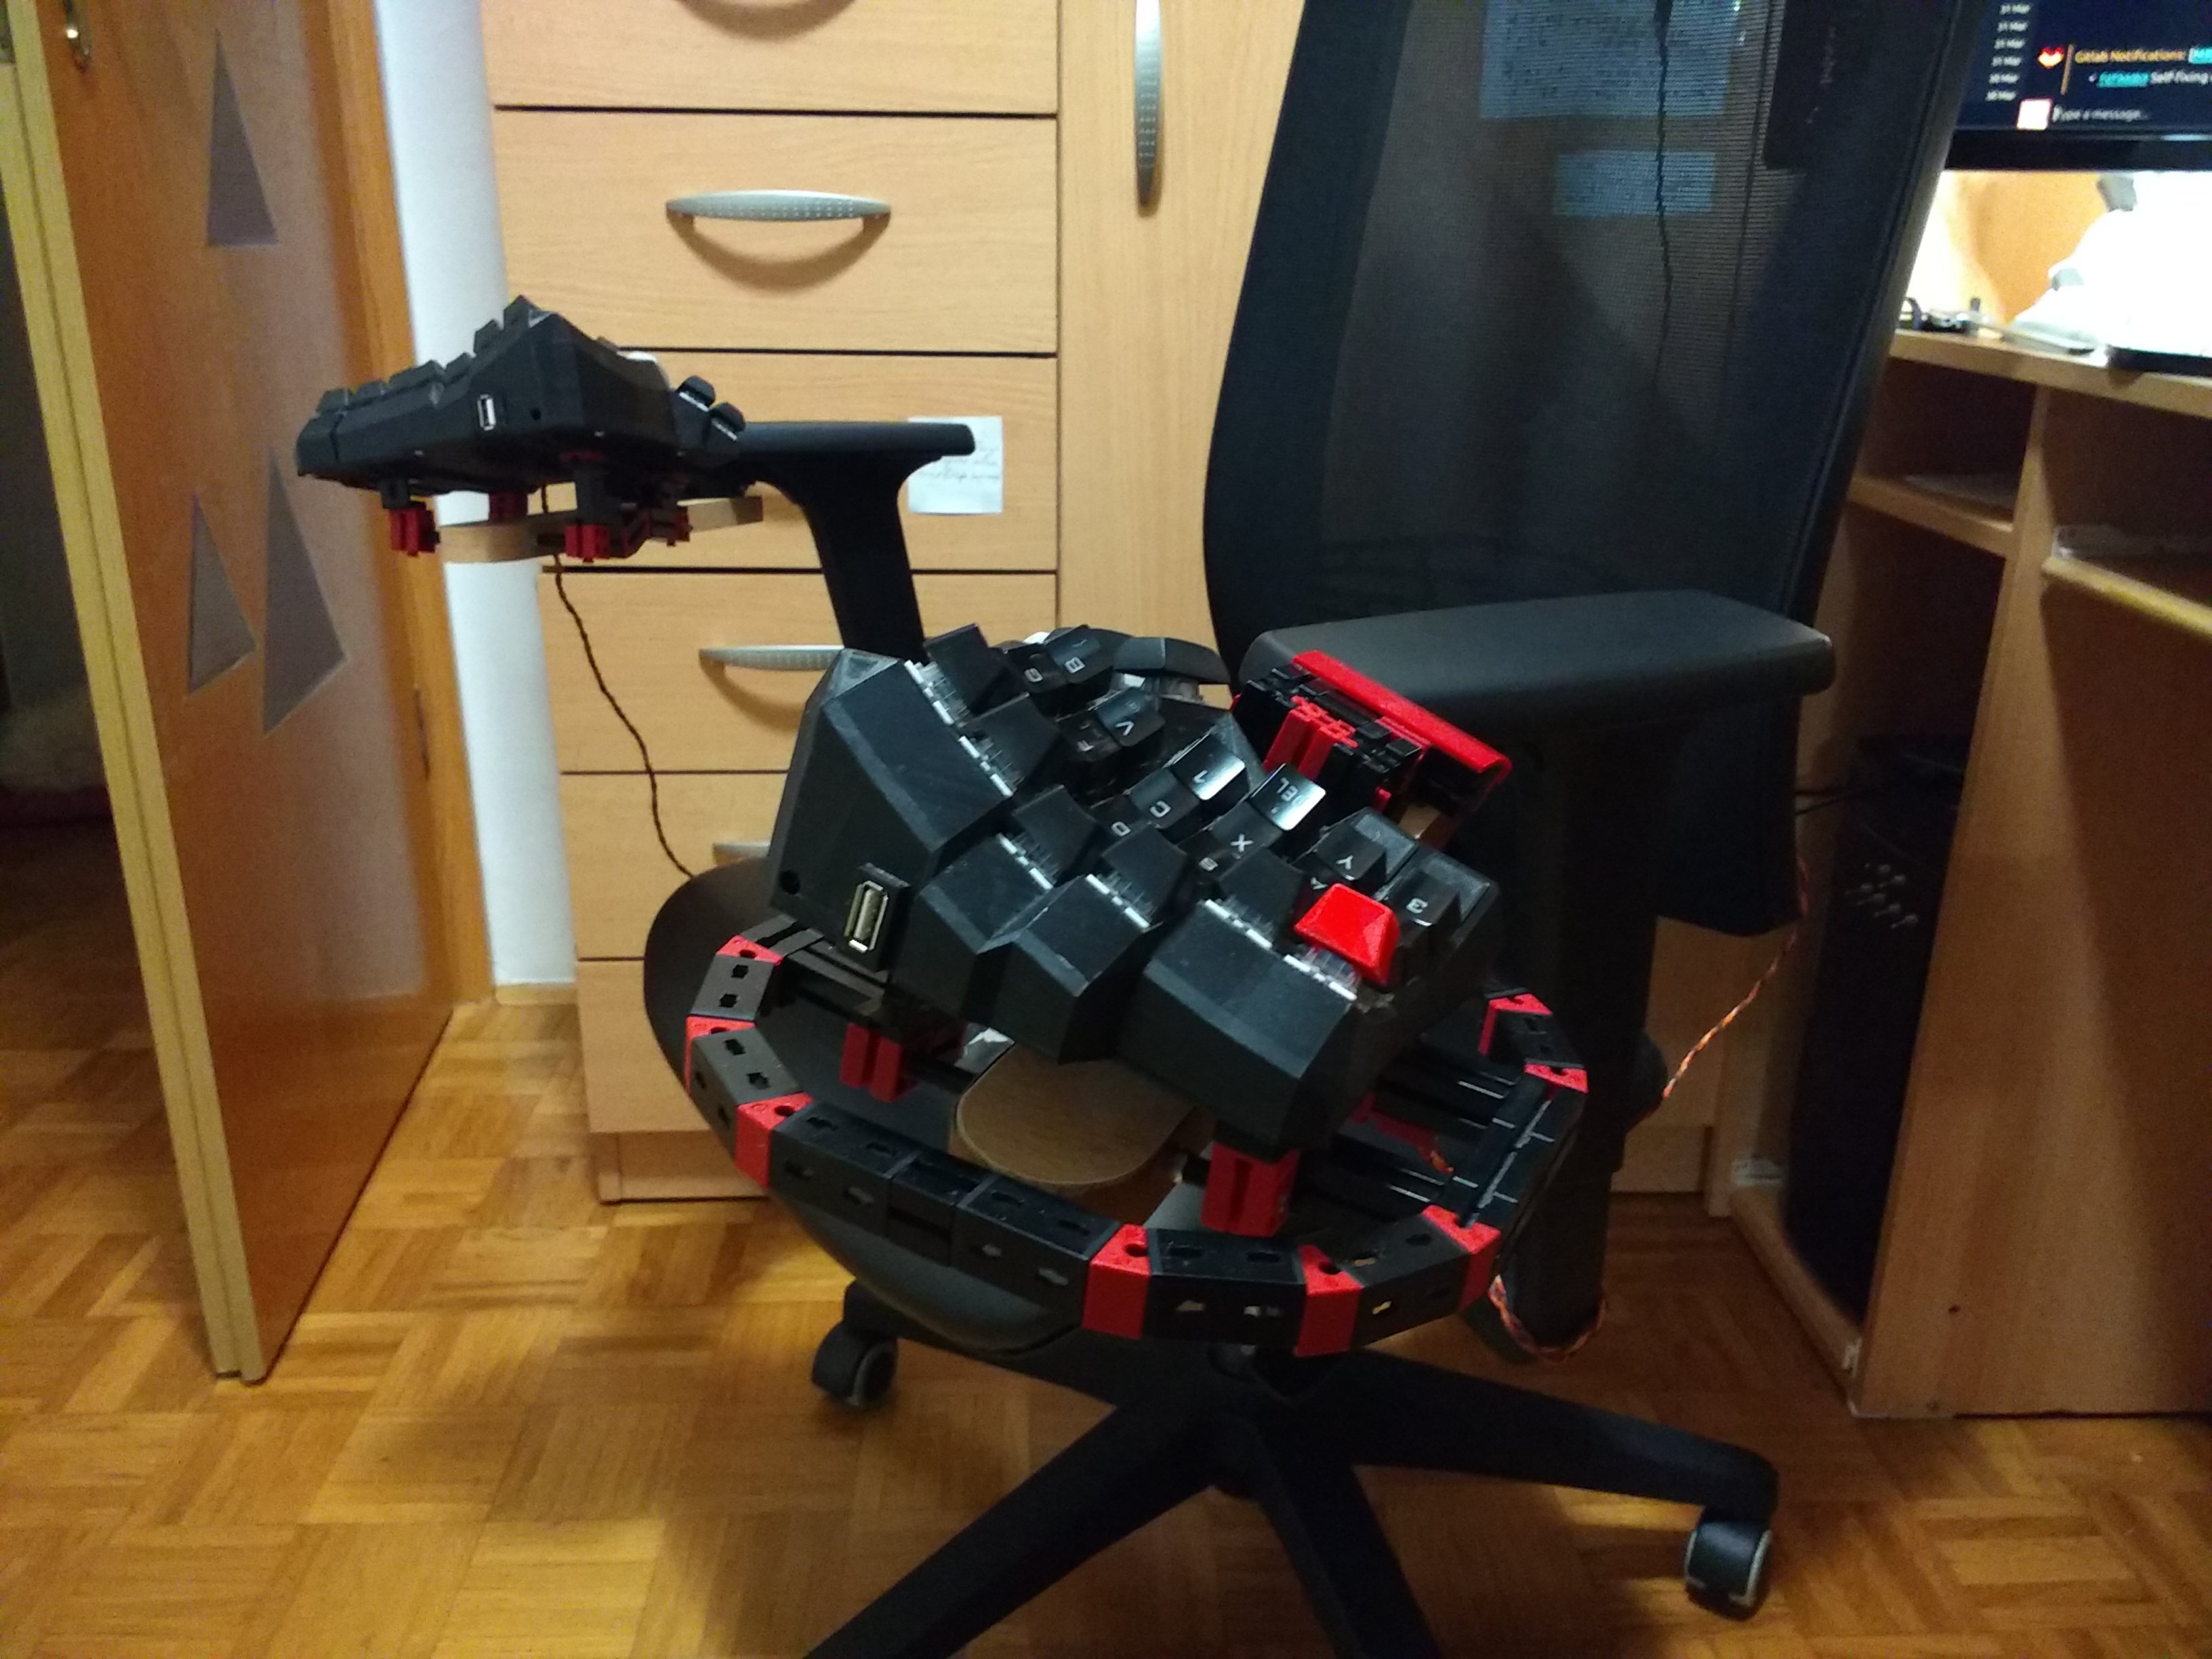
Lots of small improvements. Wires now run through a hole in the bottom plate (this way the connectors are not exposed to hitting the desk when the chair moves). The left side is particularly exposed to hitting things, so it gets a protective ring. In general, all Fischertechnik sections have been redesigned to fall apart less often. I added decorative USB ports and made one of the keys red to make it look more evil!
Importantly, the wrist rest attachments are much different now. The new design is incredibly sturdy and the wrist rests do not wiggle at all. Having wrist rests firmly fixed to the keyboard helps with typing accuracy! Additionally, the wrist rests are now easily removable, which allows the keyboard to fold back all the way when it is not needed.