A crane for my keyboard cable! (started 03/08/2021)
So, basically, I wanted a keyboard on my chair, but not wireless. In the past I've had a dangling usb cable running from my keyboard to the computer. But I found it very annoying that I can't move my chair around the room. I couldn't even spin it!
I've decided that the wire should go straight up from the chair, and then there will be a mechanism above that follows the chair.
Plan
I've been considering different materials, joints and designs. I wanted to find some good hinges to buy, but I couldn't find any that were designed to not be used in pairs. The best option was to use metal profiles that fit perfectly inside each other, so I can make some tight hinged joints.
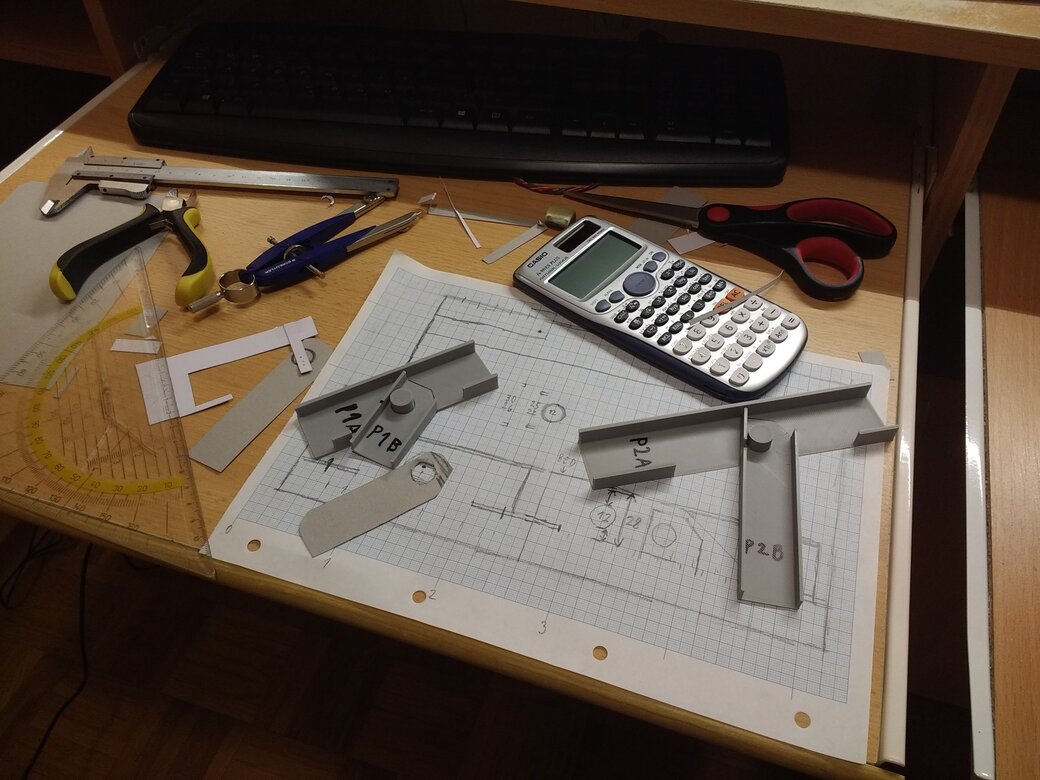
I'll be using aluminium for everything because it's light (and cheap). I'll try making everything without ball bearings at first, hopefully the wire will be able to pull it around. I made some measurements, plans and 3d printed prototypes!
Building the crane!
I pretty much followed the last prototype to make the joint. It's a rectangular hole in the side of the bigger profile, it works great!
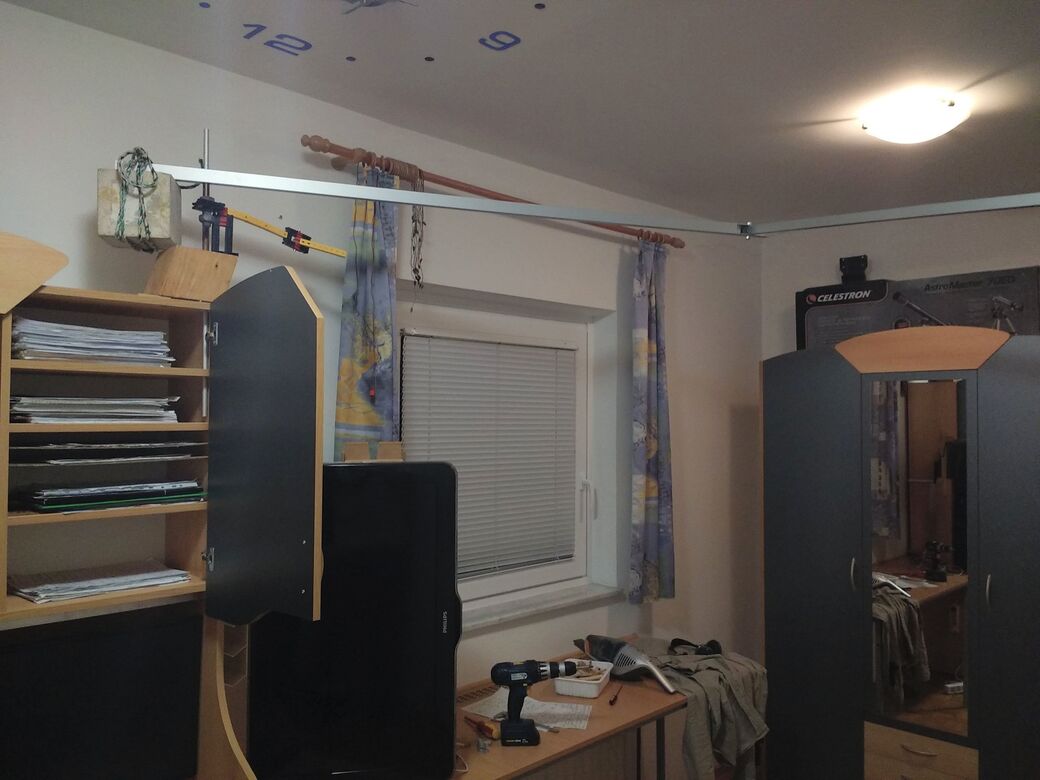
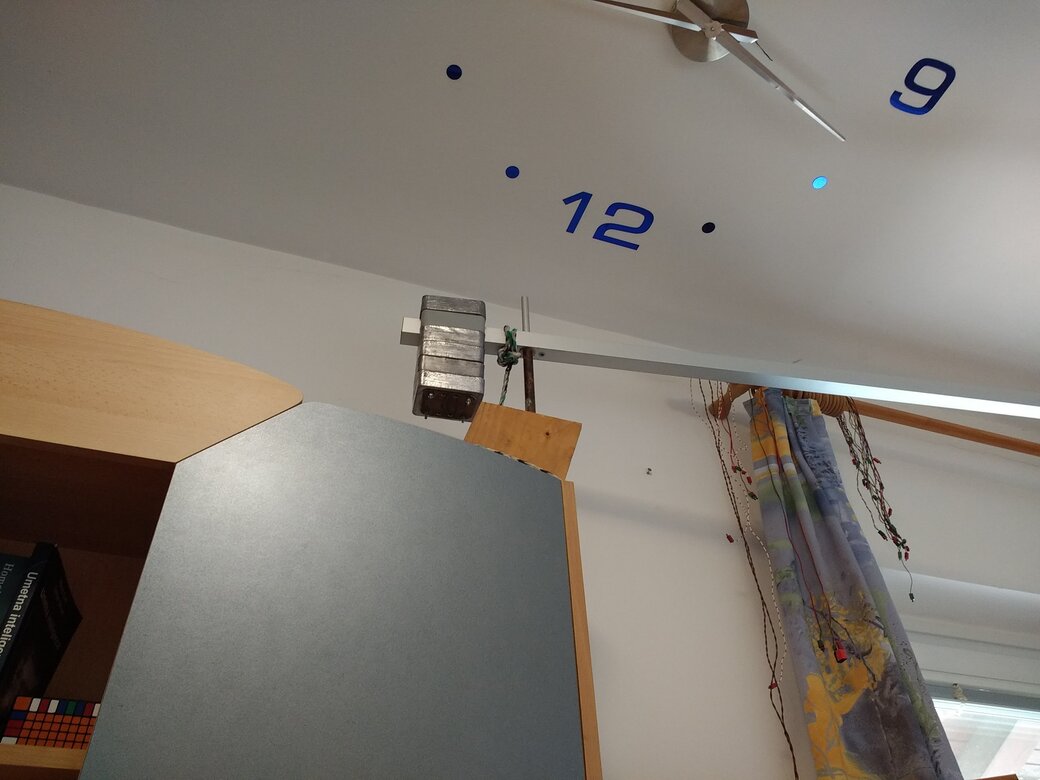
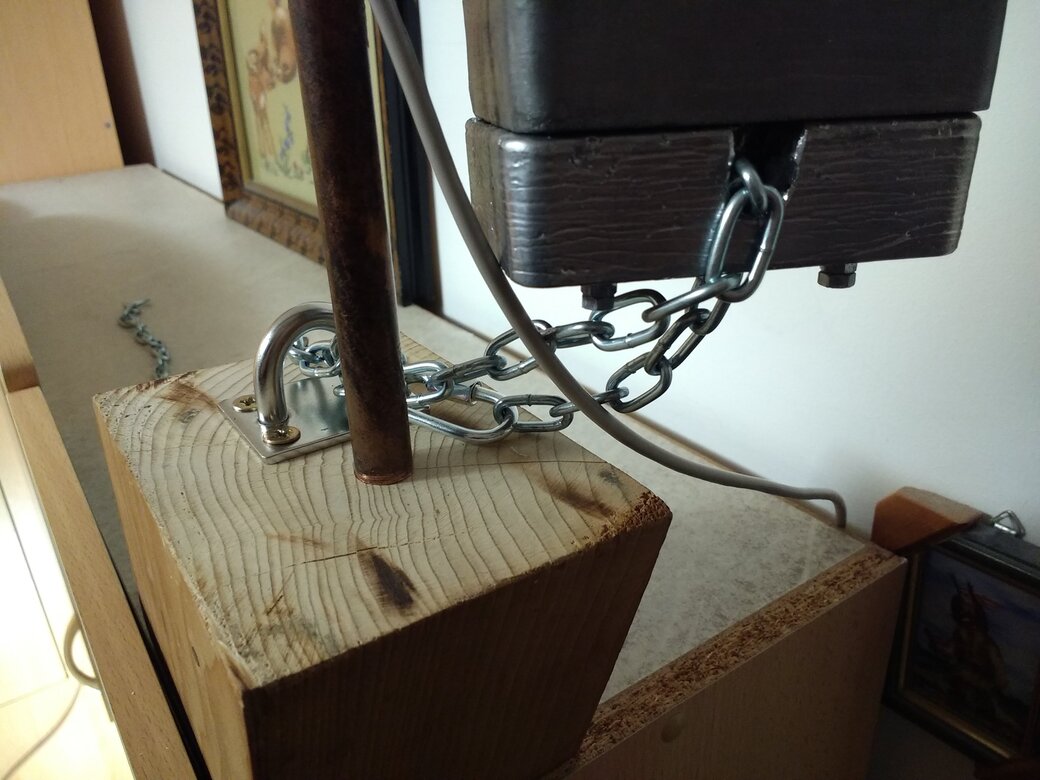
Originally I wanted to make it without a counterweight, but it soon became clear this is not an option. I can make the middle joint without a counterweight, but not the main axis. I calculated the counterweight and found this block of concrete which is just right. It feels weird to have this brick hanging over my head on a rope, but it'll do for now.
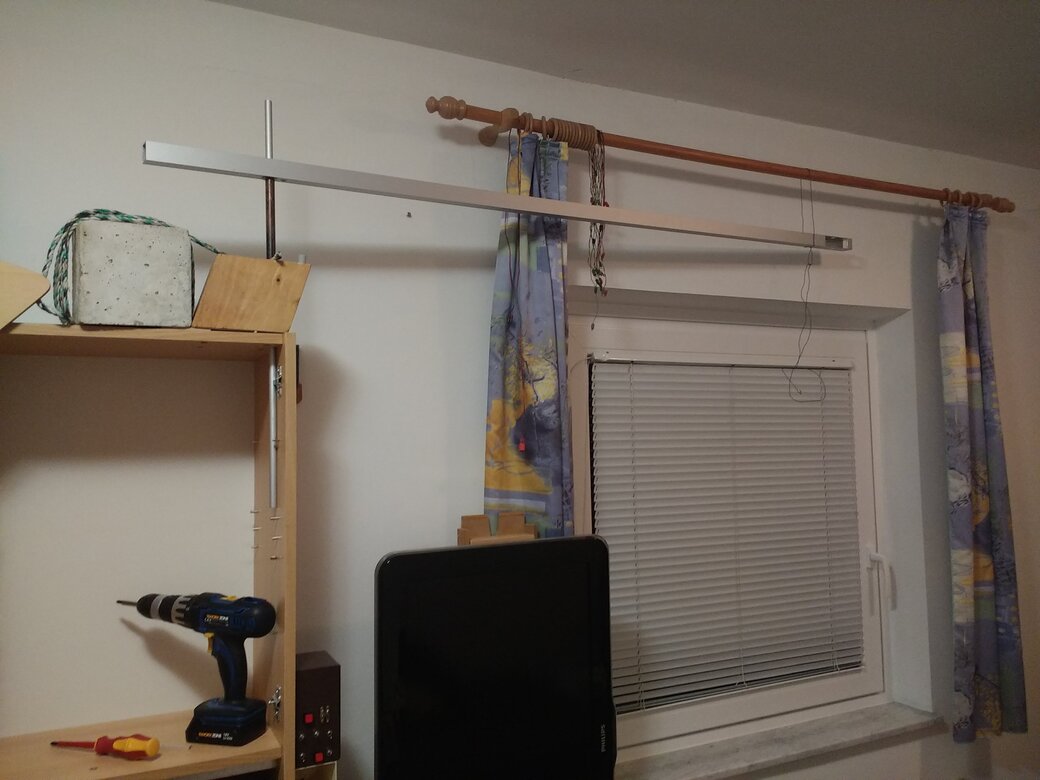
In the image you can see it mid-construction. This is when I realized the counterweight won't fit between the crane and the wood, so I needed to increase the length of the vertical spacer (a radiator pipe).
Finished structure
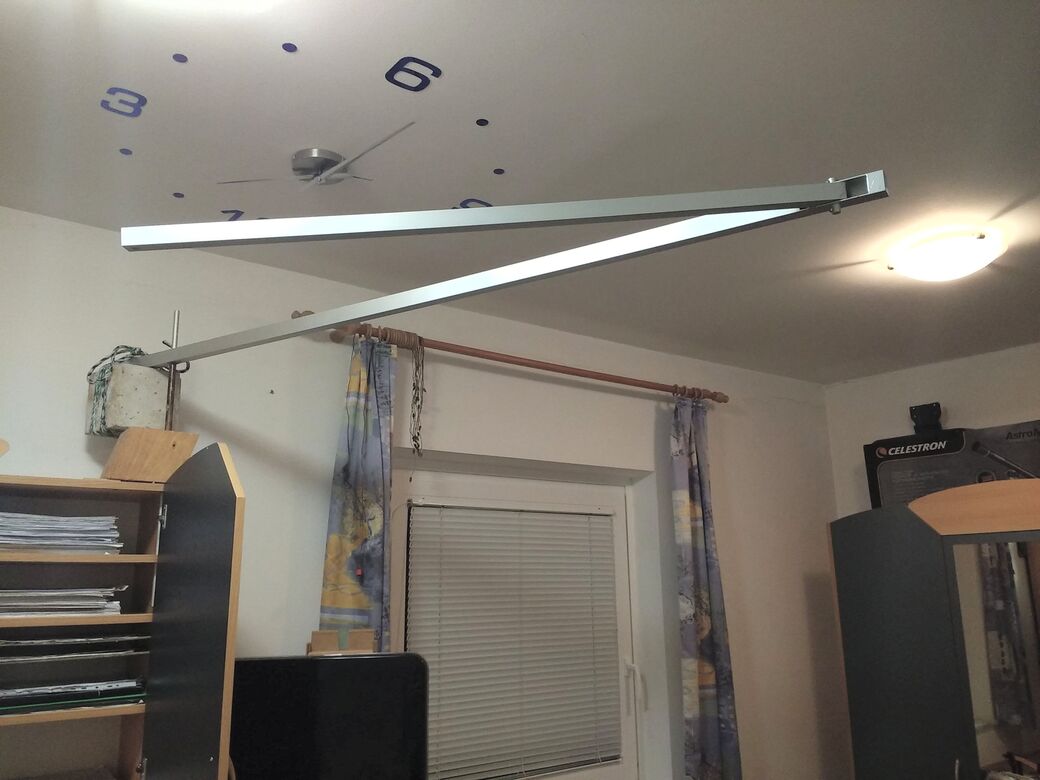
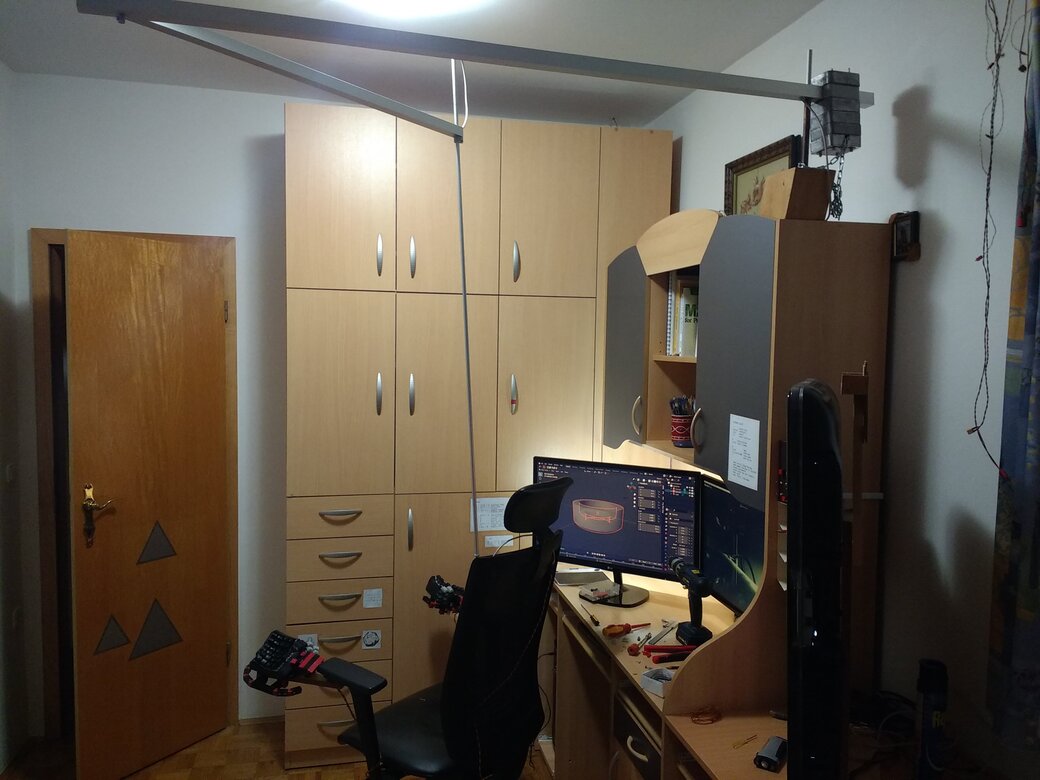
It's built and it works! This arm is 2.5m long when extended and it reaches all over the room!
I think it looks really cool, and this was one of the reasons I made it! I wanted it to be the centerpiece of the room, the first thing you'd notice when you walk in. Besides the triple screens, hihi
It'll get a wire soon. I already made a 10 meter usb cable and verified it works flawlessly, but in order to run it through the crane, I'll need to cut it and resolder it on the other side.
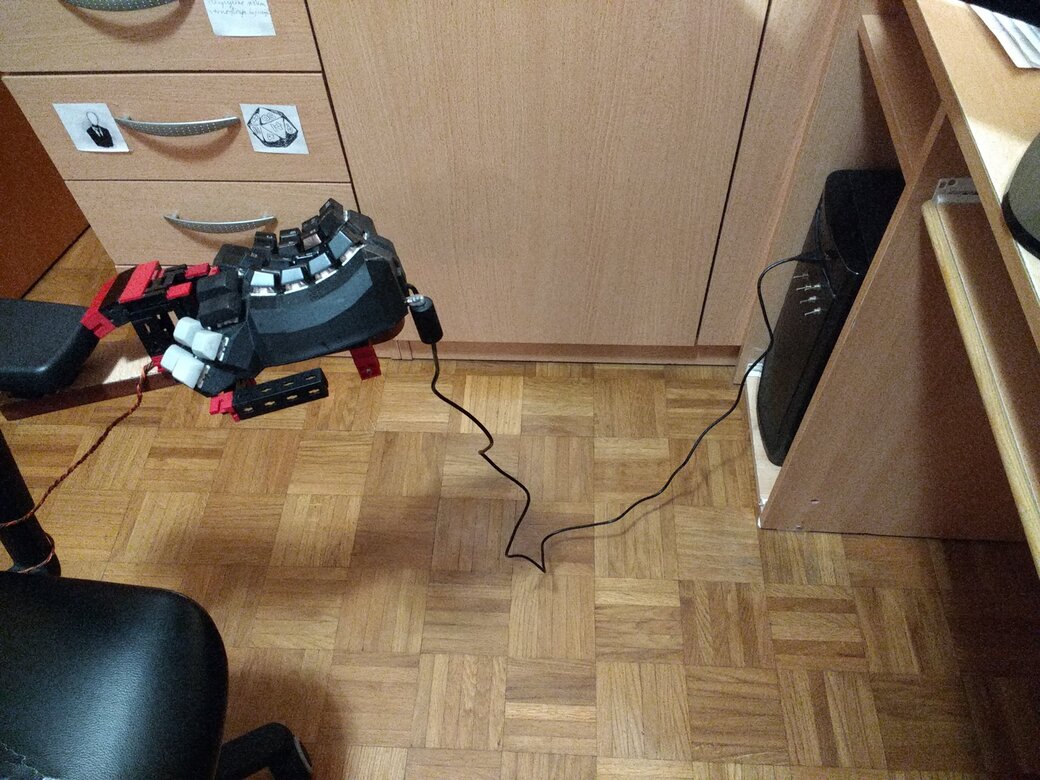
Here you can see my 15% scale Fischertechnik prototype by the real thing. It really is quite big! It looks pretty intimidating irl because it's above your head. But I like it this way!
I'm not done with this yet. I want to put something soft on the ends so it doesn't damage my walls and furniture. And obviously I need to run the wire.
Because of a change in the mounting position, the arm can actually hit the opposite wall of the room. This was not planed, it's a bit unfortunate. But I think it will be fine if the end can't damage the wall.
I somehow managed to drill unmatched holes for the main axis in the long profile, so everything is a bit tilted. This is not visible in the images but the second arm hangs down a bit. I think it'll be fine. If not, I can drill a new pair of holes and fix two problems at once.
Also, I'll be the one to say ... it kinda looks half of it is made of trash. I'll see what I can do about that. Maybe proper weights could help.
UPDATE August 26, 2021:
New weights! These are 2kg lead weights, the ones you would strap around your belt and go scuba diving. But I'm using them as a counterweight. I was able to attach them firmly by running threaded rods through the holes. If you look carefully, you'll count 6 layers, but there are only 5 weights. One of them is a 3D printed spacer that looks like an extra weight.
There is still a rope, but it's no longer used for attachment, it's just a safety percaution. If the crane breaks and starts falling, the rope will stop the weights. With this particular length of rope, it won't save the TV underneath. And, honestly, in the unlikely event that this goes to pieces, the TV is not important enough to matter. But I am!
UPDATE November 13, 2021:
I finally ran the wire through the crane and now it's fulfilling its purpose! It lets me move the chair to any part of the room and the wire stays connected!
I've added quite a few things since last time. Most noticeably, there is now an additional rod going from the end of the crane down to the chair. It is firmly attached to the crane arm, but not to the chair. This important addition solves two issues:
Firstly, the force exerted by the chair on the crane is now horizontal rather than diagonal. Thanks to the firm attachment between the horizontal and vertical section, the chair does not pull down on the crane. This way, the forces in the crane can be consistent whether it is moving or not. This is important for keeping it balanced.
Secondly, the chair now actually supports some of the weight of the crane. This relieves the joint in the middle of the crane, allowing it to run smoothly.
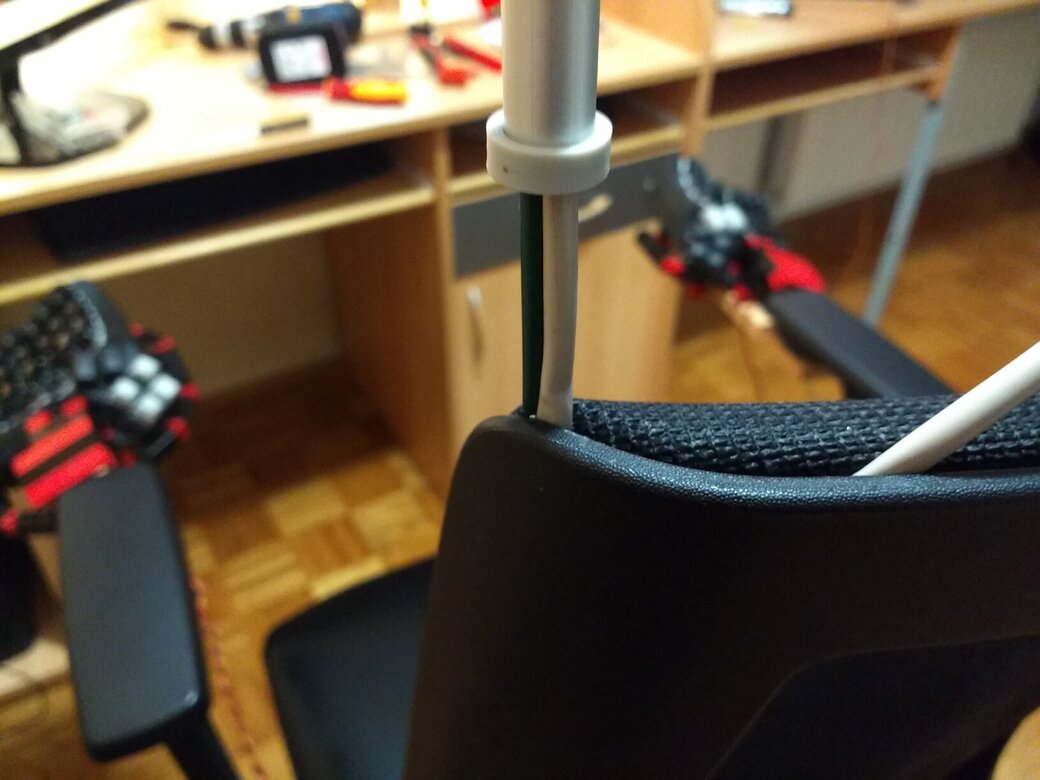
I went through many ideas for how to firmly attach the vertical rod to the crane without blocking the wire path. I wanted to drill some holes through for screws, but this compromises the structural integrity of the rod and block the wire path inside the rod (which is actually a pipe). In the end I went with something simple: I put a pipe clamp around the vertical rod. With this solution, the height is adjustable, so I can find the point where the crane runs best.
The attachment between the rod and the chair was also tricky to figure out. I wanted it to:
- reliably keep the rod aligned with the chair,
- not get in the way,
- allow the chair to spin all the way around,
- not damage the chair and
- be detachable (in the event that the chair falls over or collapses or something).
I noticed that with the way my chair is constructed, there is a tight gap at the shoulder of the seat. I pushed a thick wire into the gap, so that 20cm of it sticks out of the top of the chair like an antenna. This structural wire goes into the rod (pipe) together with the data cable and reliably holds the crane aligned with the chair. But it is still detachable - the pipe can simply be lifted up.
The wire ends in 8 individual GPIO connectors. This way, I was able to squeeze the wire through each hole in the crane. On the chair, it transitions to a braided USB cable which runs into the keyboard and attaches to the Teensy.
The funny rope by the counterweight is gone and there is a chain in its place. This is the safety chain - it's attached to the support and literally runs through the weight (to make sure it can't detach). If the crane collapses for some reason, this chain will prevent the weight from falling on me or my things. The weight is 10kg and the chain is rated for 40kg. The loop of chain creates two chains in parallel, for a total strength of 80kg. The math says it's safe.
UPDATE December 08, 2021:
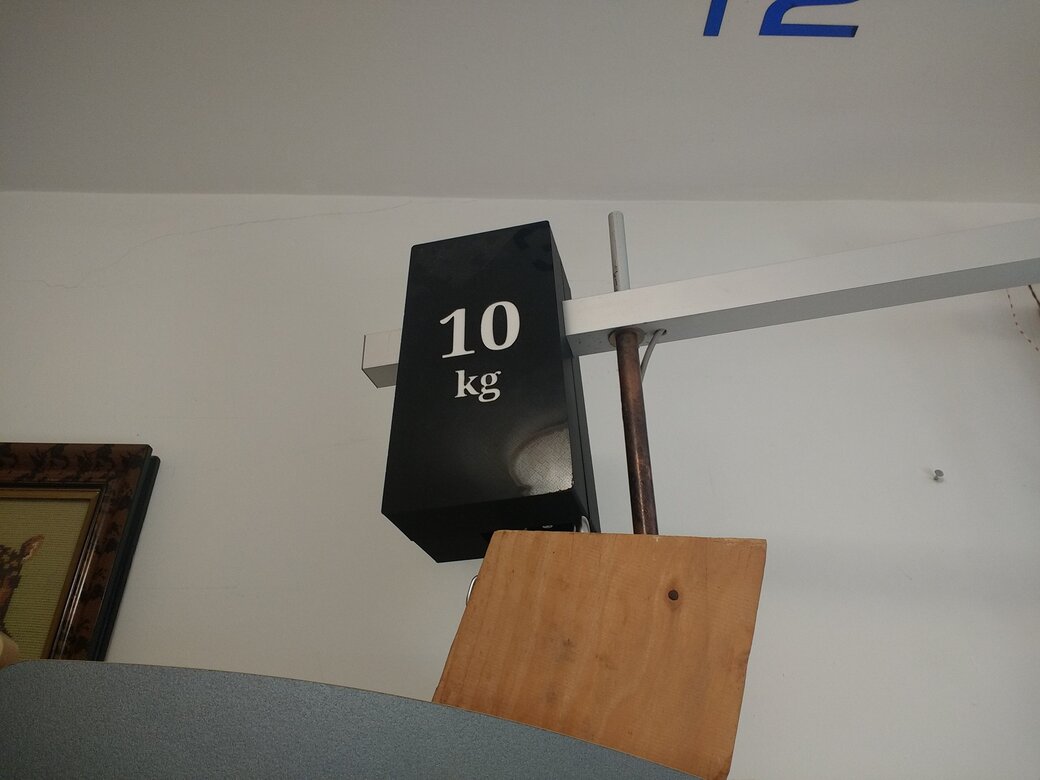
Yes, the exposed weights were very ugly. This is better. Cartoony 10kg weight! This is 3D printed in 2 halves. Actually, 8 parts, because each ellipse in the text is its own object. The white part is a thick piece of paper which everything is glued to.
One of the halves has a hole at the bottom where the chain can run through. So this addition does not compromise any functionality or safety.
UPDATE January 27, 2022:
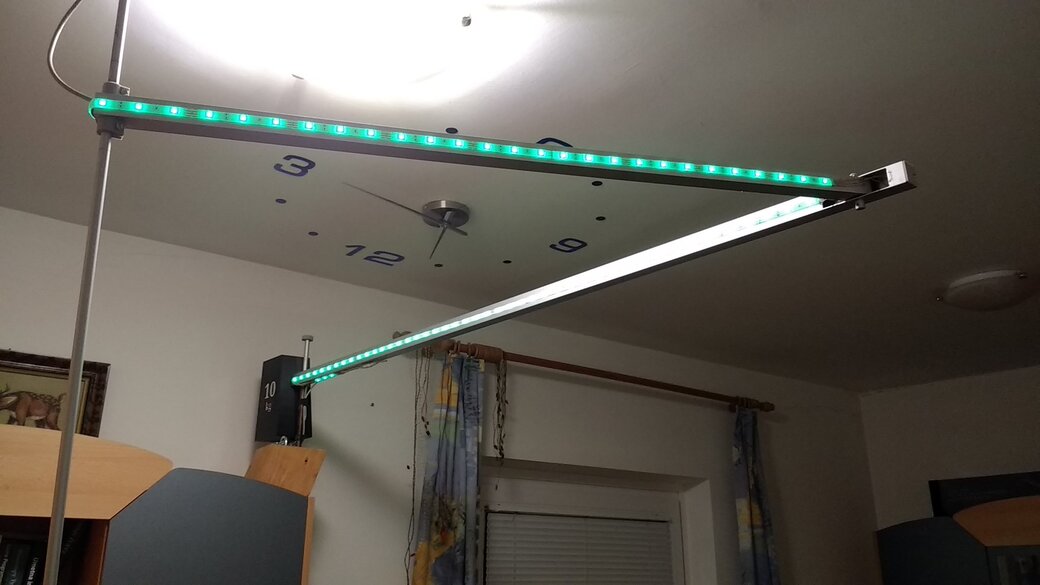
I had this LED strip so I put it on the crane. It fits perfectly! Although I did have to cut it up in a few pieces and wire them together with something more flexible than the strip itself. Those are some tight corners in that hinge!
It's one of those lights with a little remote control for picking colors and brightness. I made sure the reciever is in such a spot that I can control it from anywhere in the room. I might cut this off and use some different controller in the future. But this is ok for now.
